Wine Room Vapor Barrier: Planning and Installation Guide

*Pictures are renderings. Actual wine racks may look different
A successful vapor barrier for wine room construction depends not only on the material, but also on where it sits and whether it forms a continuous enclosure. Because a cooled wine room is colder than the surrounding space, the barrier is typically placed on the warmer, exterior side of the insulation. Walls, ceilings, floors, and adjoining spaces can all affect how that detail should be planned.
Advice about placement, materials, and gaps can vary because a vapor barrier is one part of a larger assembly. It needs to be coordinated with insulation, the door, finishes, and cooling system. This guide explains how a barrier helps manage moisture, what to assess before choosing its placement, and how to plan continuity around seams, corners, and penetrations. The right approach depends on the room's construction and what lies beyond its walls, so make these decisions before finishes conceal the details.
Key Takeaways
- Map the wine room's walls, ceiling, and floor, and identify the space beyond each surface before planning the enclosure.
- Compare conditions at interior partitions, basement or crawl-space boundaries, and exterior-facing surfaces instead of assuming one placement works everywhere.
- Plan the work in sequence: map the room, choose placement for each assembly, prepare surfaces, install and seal the barrier, then inspect it before covering.
- Coordinate insulation choices, including conventional insulation or closed-cell foam, with wall finishes, door selection, and the cooling plan.
- Include greenboard or tongue-and-groove walls and an exterior-grade door in the overall enclosure plan.
Why a Vapor Barrier for a Wine Room Protects the Whole Enclosure
A cooled wine room depends on more than its cooling unit. The walls, ceiling, floor, door, and insulation form an enclosure that must be planned for the room's intended temperature and humidity conditions. Moisture control belongs in that plan from the beginning, not as a finishing detail added after the visible surfaces have been chosen.
Think of the enclosure as a connected boundary between the wine room and the surrounding spaces. A ceiling below another room, for example, has a different context from a wall shared with an interior space. Every boundary affects how insulation and moisture control should be considered together.
What does a vapor barrier do in a wine room?
A vapor barrier is a layer designed to limit water vapor moving through a building assembly. In a wine room, it forms part of the enclosure and helps manage moisture-vapor movement through walls, ceilings, or other construction. The term is commonly used for materials intended to restrict this movement; What is a Vapor Barrier? offers a general overview of the concept.
The barrier has a different role from the cooling system. A cooling unit helps maintain the room's temperature, while the barrier addresses moisture vapor moving through building materials. Neither replaces the other. Insulation is also part of the assembly, so plan all three together rather than treating them as separate upgrades. A finished surface by itself does not show how the enclosure manages moisture.
Why does a cooled wine room need a planned enclosure?
The room's intended climate differs from the surrounding home. Moisture vapor can move through building materials, and temperature conditions across an assembly can affect where that moisture may collect. The goal is not simply to cover the interior walls, but to plan how the entire enclosure relates to the spaces around it.
Insulation is part of the room's thermal boundary. A wall shared with a conditioned room may have different conditions from a ceiling below an attic or a floor above a crawl space. Each surface relates differently to the space beyond it, so do not automatically apply the same assumption to every side of the room.
Consider the vapor barrier for wine room construction while the enclosure is being designed, alongside insulation and cooling. First identify the purpose of each layer and the surfaces it needs to address. Placement depends on the assembly and adjoining spaces, which the comparison section below covers. Planning the whole boundary first makes those decisions clearer.
How Moisture Moves Through Wine Room Walls, Ceilings, and Floors
To assess moisture movement, look at each wine room boundary and identify what is on its other side. Water vapor can move through building materials, while temperature and moisture conditions may differ across an assembly. A partition beside a living room presents a different context from a wall against a crawl space or the outdoors.
A single "warm side" assumption may not fit every surface. The room can border spaces with different temperatures and moisture conditions, and those conditions may vary by season. Start with the actual room and its surrounding spaces rather than applying one rule uniformly to every wall.
Simple enclosure map
- Above: Identify the ceiling and the room or space beyond it.
- Left and right: Label each wall by whether it faces conditioned living space, a basement or crawl space, or outdoors.
- Below: Note whether the floor sits over another space or meets a slab.
- At the boundary: Mark the door frame, corners, framing cavities, and any penetrations through the enclosure.
The wine room sits inside these surfaces. Label the space beyond each one.
How do adjacent spaces change the placement question?
Compare what each surface faces. A wall beside conditioned living space is bordered by an indoor environment. A wall beside a basement or crawl space may experience different conditions, while an exterior-facing wall introduces another set of exposures. These distinctions help frame placement, but they do not establish one answer for every room. Record how adjoining spaces are used and consider how their conditions may change through the seasons.
Why should every surface and transition be included?
Trace the enclosure continuously: follow each wall to the ceiling, down to the floor, and around the door frame. Note where framing cavities meet and where pipes, wiring, ducts, or other components pass through. These edges and openings can interrupt continuity if they are left out of the plan. Mark them before construction, while the assembly is visible and the details can be coordinated.
A practical assessment starts with a sketch. Label each wall, the ceiling, and the floor, then note what lies beyond each surface. Add corners, framing transitions, the doorway, and penetrations. This gives vapor barrier for wine room planning a project-specific starting point and makes it easier to compare assemblies without assuming that every surface behaves alike.
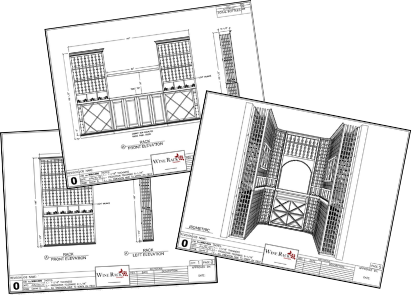
For a custom cellar, organizing the room layout alongside its enclosure details can clarify design decisions before materials and finishes are set. A 2-D wine cellar design can help establish that layout as part of the planning process.
Choosing Vapor Barrier Placement for Different Wine Room Assemblies
Placement depends on the complete assembly, not only on the fact that the room is cooled. Identify what lies beyond each wall, the ceiling, and the floor, then consider the insulation and other planned layers together. Use the comparison below to assess those conditions. It is a planning aid, not a universal placement prescription.
| Assembly condition | What to assess | Placement question |
|---|---|---|
| Wall beside conditioned interior space | Consider the adjoining room and how its temperature and use compare with the wine room. | How do the two sides of the wall relate across the seasons, and how does the full wall assembly address that relationship? |
| Wall or floor beside a basement or crawl space | Note whether the adjoining space is conditioned and consider how its conditions may vary seasonally. | Does this surface have the same conditions as the room's other boundaries, or does it need separate assembly planning? |
| Exterior-facing wall, ceiling, or floor | Identify the outdoor-facing surface and the layers planned between it and the wine room. | How does the complete assembly account for the differing conditions on either side of this boundary? |
Use the room map to make a surface-by-surface assessment. A wine room with a shared wall, an exterior wall, and a ceiling below another space has several distinct conditions to consider. Record the adjoining space and planned insulation for each assembly rather than carrying one assumption from the first wall to every other surface.
When does the conventional-insulation recommendation apply?
Wine Guardian's published guidance for conventional insulation recommends 4 mil plastic, overlapped seams, and tape. Treat these details as that source's recommendation, not as a universal construction rule or a product specification for Wine Rack Concepts. Whether they suit a particular room depends on its complete assembly and the applicable product instructions.
How should closed-cell foam and mixed conditions be considered?
Wine Rack Concepts' cellar construction guidance identifies closed-cell foam insulation, but that reference alone does not establish whether a separate vapor-control layer is needed in every assembly. Assess the planned layers and each adjoining space together. If one room has shared, exterior-facing, and basement-facing surfaces, evaluate each condition instead of assuming the same approach applies throughout.
Conventional insulation and closed-cell foam are different assembly choices, but the insulation name alone does not settle barrier placement. Document the layers and conditions for every surface before finalizing installation details. This keeps vapor barrier for wine room planning tied to the actual enclosure, with the installation method based on the selected assembly and its instructions.
How to Install and Check a Continuous Wine Room Vapor Barrier
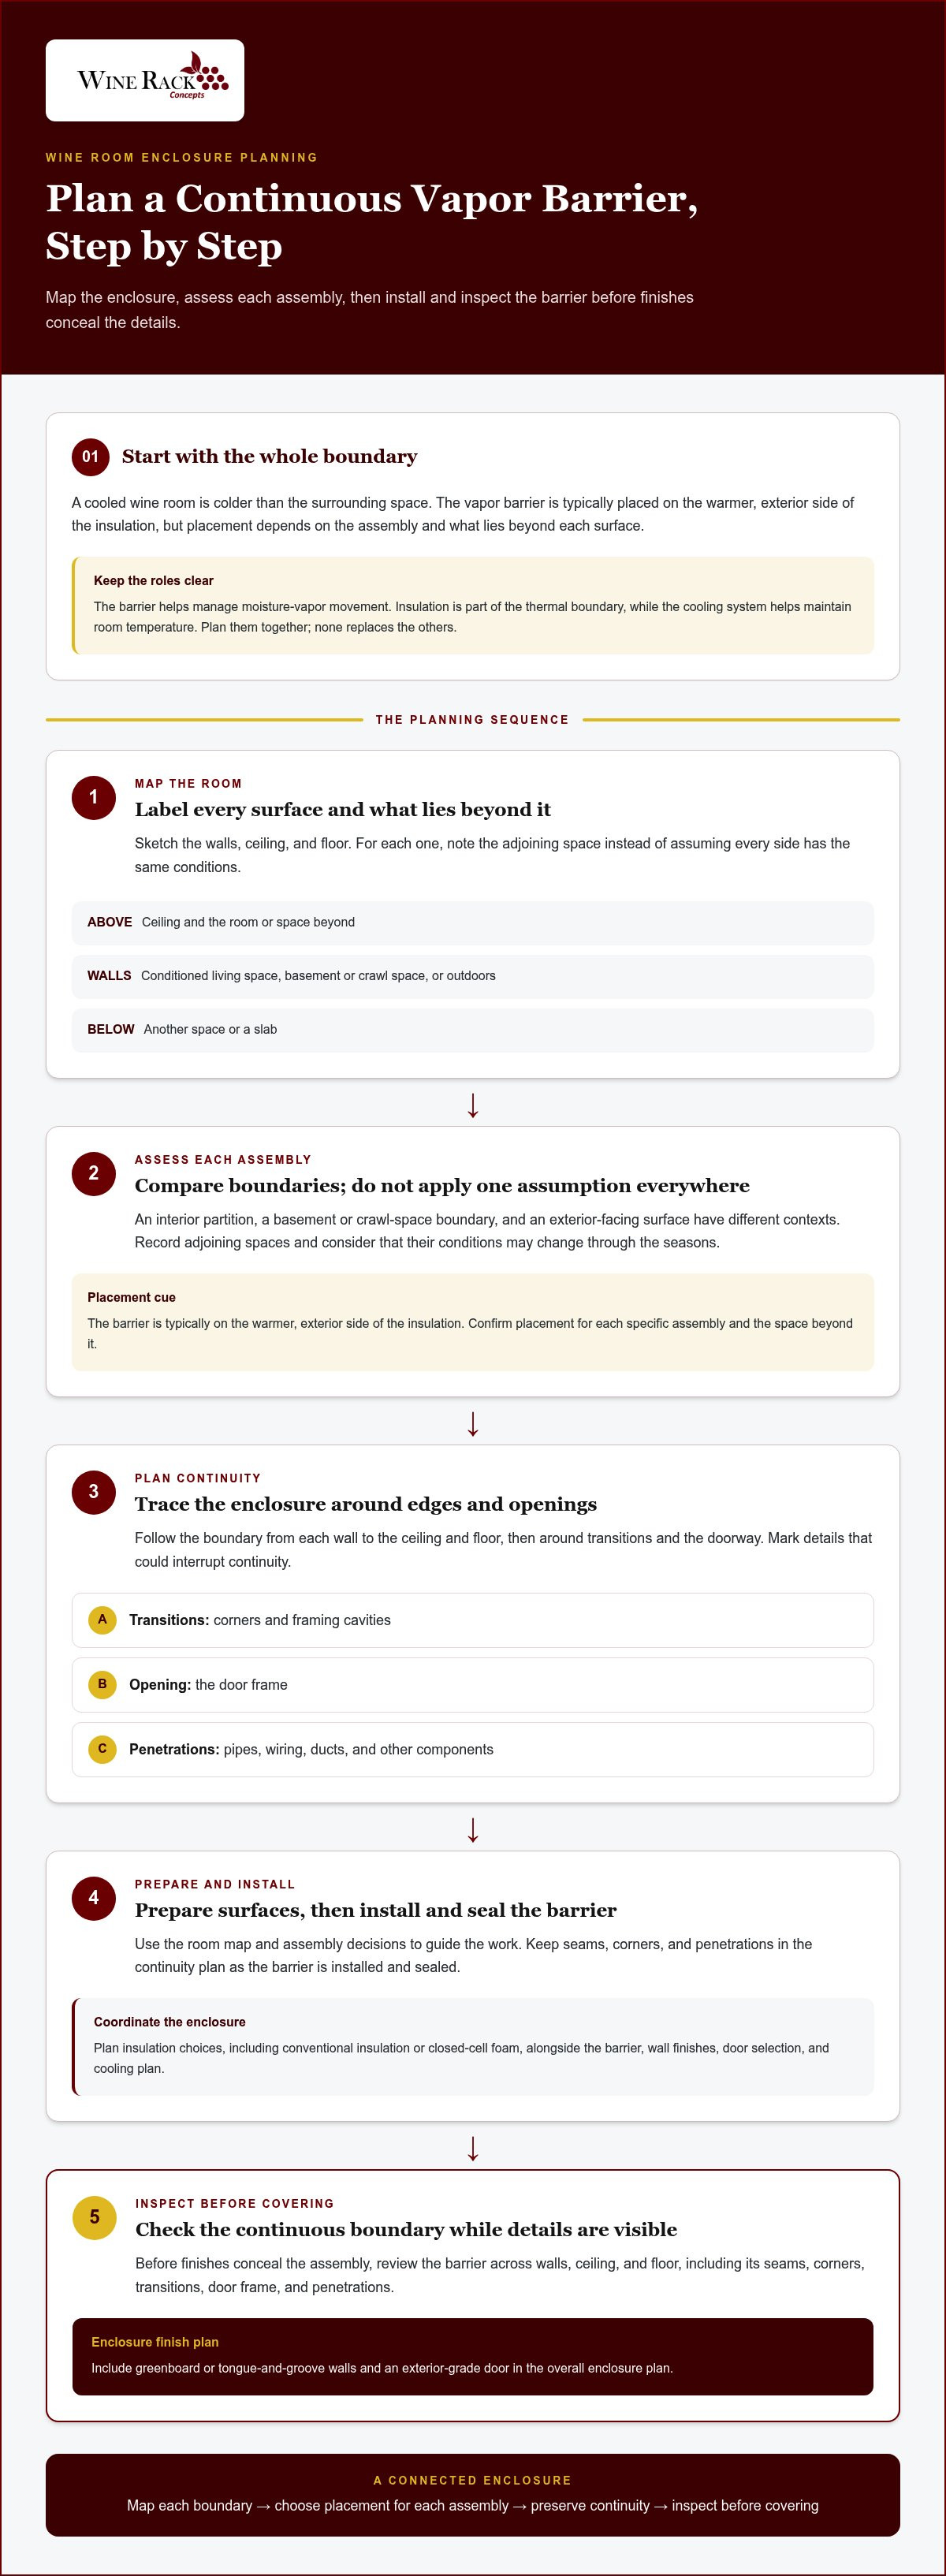
A careful installation starts with a plan for the complete enclosure, not just the broad wall surfaces. Use the selected assembly and product instructions to determine the appropriate materials, placement, attachment, and sealing details. The sequence below helps organize the work before finishes conceal the connections.
- Map the enclosure. Record each wall, the ceiling, floor, doorway, and adjoining space. Mark framing and joist cavities, corners, and planned penetrations such as wiring or piping so transitions are visible on the plan.
- Set placement for the assembly. Use the room map and the adjoining conditions to determine where the barrier belongs on each surface. Do not assume that a detail for one wall automatically applies to the ceiling, floor, or another wall.
- Prepare the surfaces. Confirm the planned insulation and finish sequence before beginning. Make sure the surfaces and framing are ready for the selected barrier, following the material's instructions for preparation and handling.
- Install the barrier. Work across the planned surfaces and carry the material through identified transitions as the assembly requires. Keep the route around corners, door openings, and framing spaces in view as installation proceeds.
- Seal seams and details. Treat overlaps, edges, corners, and penetrations according to the selected product instructions. Do not assume that tape or a particular overlap detail suits every material or assembly.
- Inspect before covering. Review the enclosure while the barrier is accessible. Look for visible gaps, incomplete connections, or missed transitions, and address them according to the assembly and product instructions before installing finishes.
Continuity sketch
- Wall sheet: Show the planned overlap where material sections meet.
- Top edge: Trace the connection from wall to ceiling and into the joist transition, if the assembly calls for it.
- Bottom edge: Mark how the wall meets the floor or adjoining floor assembly.
- Opening: Trace the barrier around the door frame.
- Penetration: Mark each pipe, wire, or other service passing through the enclosure and note its planned detail.
Read the sketch as one continuous route around the room, with every edge and opening accounted for.
What should be mapped before installation?
Include the full room perimeter, ceiling, floor, doorway, and the space beyond each surface. Add framing cavities, joist spaces, and service penetrations, then match the plan to the intended insulation and finish order. This makes it easier to identify material transitions that need attention before work begins.
How can continuity be checked before finishes go in?
Follow the installed barrier around the room and inspect seams, corners, edges, joist transitions, and openings for visible gaps or incomplete connections. Compare the work with the plan, especially where surfaces meet or services pass through. This check can identify details that need attention before they are concealed. It does not guarantee a particular result.
Coordinate the Vapor Barrier With Wine Cellar Insulation, Finishes, and Cooling
A wine room comes together through connected decisions. The barrier assembly affects how insulation and finish layers are planned, while the door and cooling system are part of the overall design. Coordinate these choices early, before walls are closed and finishes are installed.
How do finishes and doors fit into the enclosure plan?
Set the insulation and barrier assembly before finalizing the finish schedule. This gives you a chance to account for how each layer meets at edges, corners, openings, and other transitions. Greenboard and tongue-and-groove walls are finish options in Wine Rack Concepts' cellar construction guidance. Consider their place in the sequence alongside the planned assembly.
Door selection also belongs in the enclosure discussion. Exterior-grade wood, fiberglass, glass, or metal doors can be considered, with the opening and its surrounding details included in the room plan. The material choice does not remove the need to coordinate the door frame with adjoining wall and finish layers. Treat the doorway as part of the room boundary, not as a separate detail to resolve after the walls are complete.
When should cooling and design decisions be coordinated?
Plan cooling alongside the room layout and enclosure, rather than after construction details have been settled. Wine cellar cooling options include self-contained, ducted, and ductless systems. Include the cooling approach in the project plan so the room layout can account for the system and its relationship to the finished space. Explore the available wine cellar cooling options as part of that planning.
This coordination is especially useful when the cellar is intended as a visible feature. Racking, finishes, doors, and cooling all contribute to the design, so considering them together helps clarify how the enclosure will be built and presented. A custom wine cellar design can bring those choices into one room plan, including how vapor barrier for wine room construction fits within the larger assembly.
Before work begins, bring the layout, adjoining spaces, insulation, barrier approach, finish preferences, door choice, and cooling plan together. Coordinating these decisions gives the project a clearer path from enclosure planning to the finished cellar.
Move From Room Concept to a Clear Cellar Plan
A wine cellar is a lasting addition to a home or commercial space, and early planning gives its design a stronger starting point. Think beyond the display: intended use, layout, and construction choices all influence how the finished space comes together. A well-planned vapor barrier for wine room construction belongs within that larger vision, connecting practical enclosure decisions with the cellar you want to create.
Bring your ideas into one plan. Consider how you want to use the space, the aesthetic you prefer, and the details that matter most to your collection. A clear design can turn those priorities into a cohesive direction before the room moves from concept toward construction.
With a thoughtful plan in place, you can move forward with greater clarity toward a cellar designed around your vision.
Frequently Asked Questions
Is a vapor barrier necessary for every wine room?
Not necessarily. The right approach depends on the room's construction and the spaces around it. A newly framed room sharing walls with conditioned rooms may call for different assembly decisions than a closet under an attic or beside a crawl space. Before choosing materials, identify what each surface faces and how the proposed insulation and finish layers fit together. This project-specific assessment is more useful than assuming every cellar needs the same detail.
Which side of the wall should a wine room vapor barrier go on?
There is no one side that applies to every wine room wall. Consider the complete wall assembly, including its insulation, the space on each side, and how those conditions may change with the seasons. A wall shared with a living area, for example, has a different adjoining environment from one facing outdoors. Map those conditions first, then determine placement for that assembly using the selected materials' instructions.
Can closed-cell foam insulation replace a separate vapor barrier?
Do not assume that closed-cell foam automatically replaces a separate vapor-control layer. The insulation choice alone does not establish what the complete wall or ceiling assembly requires. Review the specific product instructions and consider how the foam fits with the other planned layers and the spaces adjoining the room. If the cellar uses different insulation across its walls and ceiling, assess those areas separately rather than treating one material choice as the answer for the entire enclosure.
Should a wine room vapor barrier cover the ceiling and floor too?
Assess the ceiling and floor as parts of the complete enclosure rather than focusing only on the walls. A ceiling below a conditioned room has a different context from one below an attic; a floor over a crawl space differs from a slab. These examples do not dictate a universal detail, but they show why each surface and its adjoining space belong in the plan. Follow the selected assembly and material instructions.
How should a vapor barrier be handled around a wine room door?
Plan the door opening as part of the enclosure, including the connection between the surrounding wall layers and the frame. A barrier that stops at the edge of the rough opening may leave its transition unaddressed. Decide how the materials meet around the frame as part of the overall assembly, and follow the product instructions for that connection. Include the door detail before the frame and finish trim hide the surrounding construction.
What happens if there are gaps in a wine room vapor barrier?
Gaps can interrupt the intended continuity of the barrier and leave an unplanned route through the assembly. Their significance depends on where they occur and how the wall, ceiling, or floor is built, so a gap alone does not predict a particular outcome. Before finishes go in, compare seams, corners, penetrations, and edges with the enclosure plan. Address incomplete connections using the selected product's instructions.
Can an existing basement or closet be converted into a climate-controlled wine room?
Yes, an existing basement or closet can be a starting point, but its current construction shapes the plan. Note what lies beyond each wall, the ceiling, and the floor, then coordinate the enclosure, insulation, door, finishes, and cooling approach for that layout. A closet under an attic, for instance, has different adjoining conditions from a basement room. For homeowners who need help handling framing alterations, drywall, or door fitting during a remodel, partnering with a dependable team like American Handyman can ensure the structural prep work is completed properly. Planning these elements together helps establish a coherent path for the conversion.
Have an expert help today!
Free 2D wine cellar design