Wine Cellar Design Mistakes to Avoid: A Professional Planning Checklist

*Pictures are renderings. Actual wine racks may look different
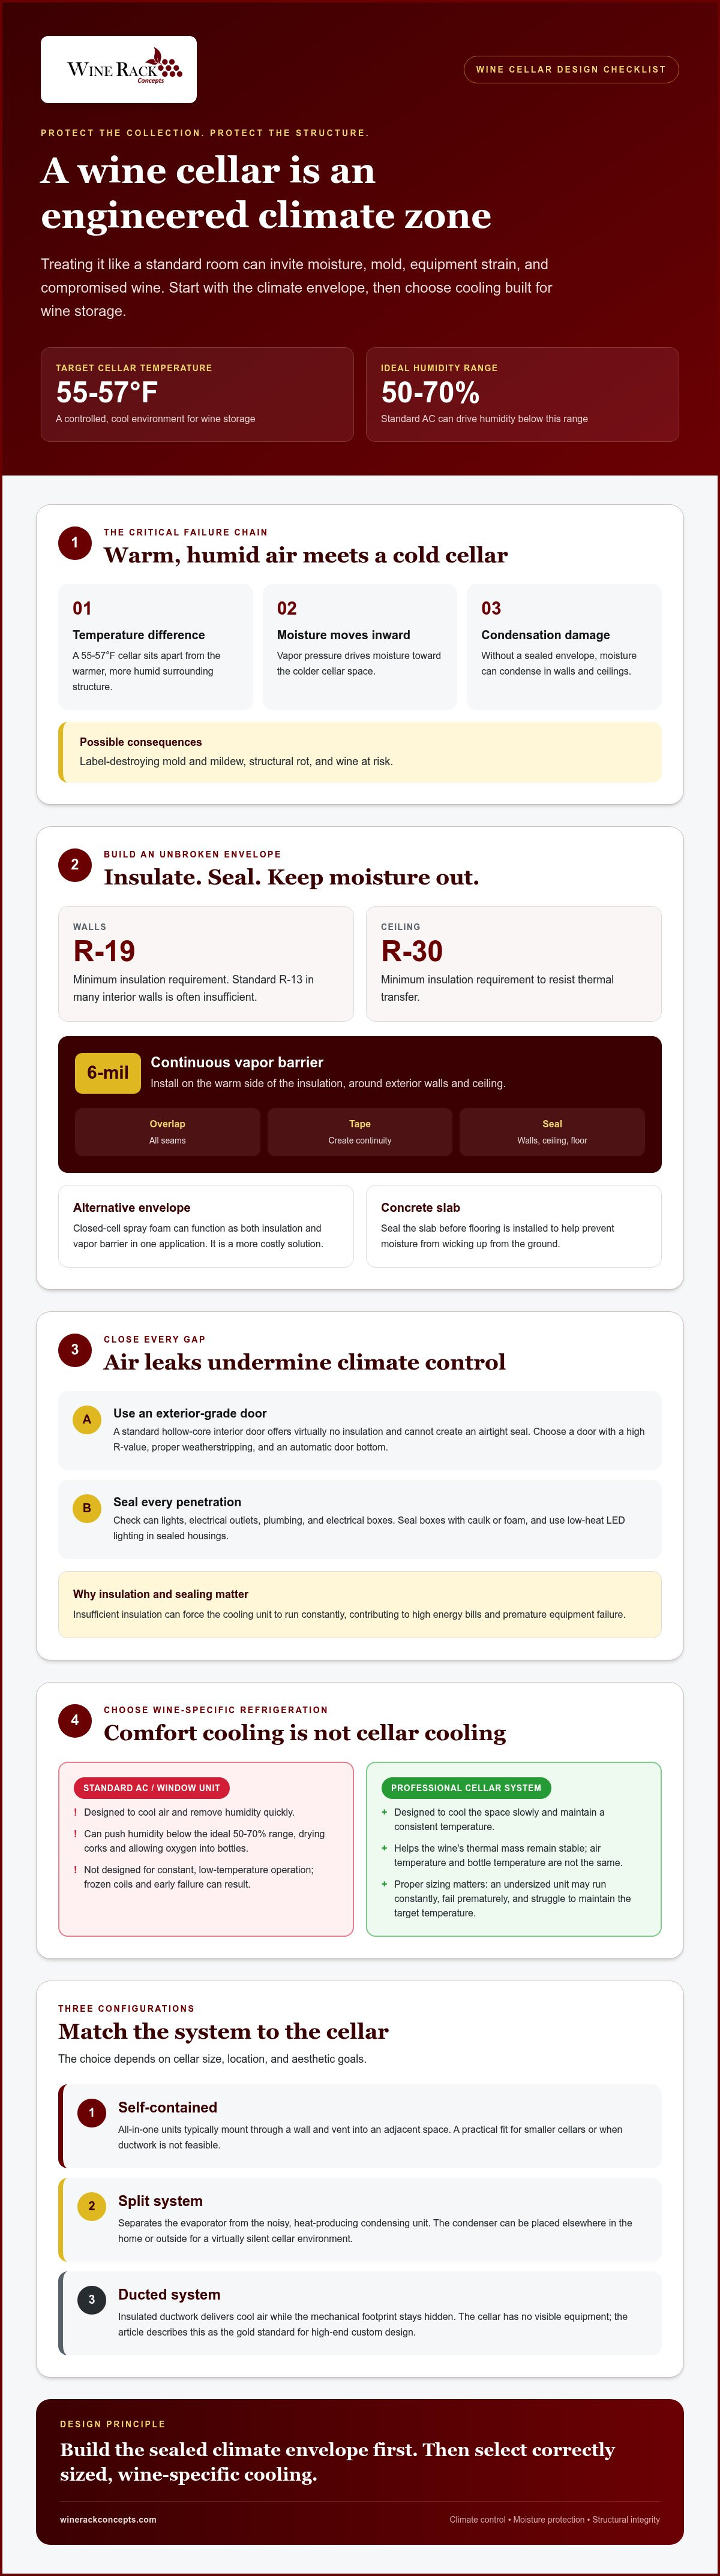
A prized wine collection represents years of passion, patience, and investment. Yet, a few common design mistakes can turn a dream cellar into a costly nightmare, compromising the very bottles it was built to protect. The most critical error is forgetting that a wine cellar is an engineered climate zone first and a design feature second. Ignoring the physics of temperature, humidity, and vapor pressure is the number one cause of failure, leading to mold, damaged labels, and ruined wine. Avoid the costly errors that compromise wine aging and structural integrity with our comprehensive design checklist.
This guide moves beyond generic advice to provide a professional-level checklist, helping you identify and prevent the critical mistakes that can undermine your cellar’s performance. From the unseen vapor barrier to the choice of cooling system, every detail matters in creating an environment where your collection can thrive for decades.
Treating the Cellar Like a Standard Room: The Infrastructure Gap
The most fundamental mistake in wine cellar design is treating the space like a standard closet or finished basement. A wine cellar is not merely a room with racks; it is a precisely controlled environment engineered to protect a delicate organic product. Unlike a regular room, a cellar is actively cooled to 55-57°F, creating a significant temperature and humidity differential with the surrounding structure. This difference triggers the laws of physics, specifically vapor pressure, which causes moisture from the warmer, more humid ambient air to constantly try to infiltrate the colder, drier cellar space. Without a proper "envelope," this moisture will condense inside your walls and ceiling, leading to label-destroying mold, mildew, and even structural rot.
To prevent this, a continuous vapor barrier must be installed on the warm side of the cellar insulation, completely isolating the climate-controlled space from the rest of the building.
The Vapor Barrier and Insulation Checklist
Creating a stable environment starts with an unbroken, sealed envelope. This is non-negotiable, whether your cellar is a small closet or a grand showroom.
- Sufficient Insulation: Standard R-13 insulation found in many interior walls is often insufficient. A wine cellar requires a minimum of R-19 for walls and R-30 for the ceiling to effectively resist thermal transfer. Insufficient insulation forces the cooling unit to run constantly, leading to high energy bills and premature equipment failure.
- Proper Vapor Barrier: The most common method is a 6-mil plastic vapor barrier, which should be wrapped around the exterior walls and ceiling of the cellar (the "warm side" of the insulation). All seams must be overlapped and taped to create a continuous, impermeable shield. Alternatively, closed-cell spray foam insulation can serve as both the insulation and vapor barrier in a single application, offering a superior but more costly solution.
- A Completely Sealed Envelope: The vapor barrier and insulation must be continuous. This includes the walls, ceiling, and floor. For cellars built on a concrete slab, the slab should be sealed before any flooring is installed to prevent moisture from wicking up from the ground.
Airtight Seals and Structural Integrity
Even with perfect insulation, air leaks can sabotage your cellar's climate. Every penetration in the envelope is a potential point of failure.
- Exterior-Grade Doors: A standard hollow-core interior door offers virtually no insulation and cannot create an airtight seal. You must use an exterior-grade door with a high R-value, proper weatherstripping, and an automatic door bottom to seal the gap at the floor. Our specialized metal wine cellar doors are engineered with thermal breaks and integrated seals to maintain the cellar’s integrity while providing a modern aesthetic.
- Sealing All Penetrations: Every opening must be sealed. This includes can lights, electrical outlets, and plumbing. Use low-heat lighting like LEDs in sealed housings, and ensure all electrical boxes are carefully sealed with caulk or foam to prevent air exchange.
Cooling System Errors: AC Units vs. Professional Refrigeration
A common and disastrous mistake is attempting to use a standard air conditioner or a window unit to cool a wine cellar. These systems are designed for "comfort cooling," not the precision cooling required for wine aging. They are engineered to cool air and remove humidity quickly, which is the exact opposite of what a wine cellar needs.
Standard AC units will strip too much moisture from the air, causing humidity levels to plummet below the ideal 50-70% range. This dries out corks, allowing oxygen to enter the bottle and spoil the wine. Furthermore, these units are not designed to run in the constant, low-temperature conditions of a cellar, leading to frozen coils and early failure. It is also critical to understand thermal mass; the temperature of the air and the temperature of the liquid in the bottles are two different things. A professional wine cellar cooling system is designed to cool the space slowly and maintain a consistent temperature, allowing the thermal mass of the wine to remain stable. Undersizing a unit is another frequent error; a system that runs constantly will fail prematurely and struggle to maintain the target temperature.
Choosing the Right Cooling Configuration
Wine cellar refrigeration units are specialized machines. Choosing the right type depends on your cellar's size, location, and aesthetic goals.
- Self-Contained Refrigeration Units: These all-in-one systems are the simplest to install, typically mounting through a wall and venting into an adjacent space. They are ideal for smaller cellars or situations where ductwork is not feasible.
- Split Systems: A split system separates the evaporator (the cold side) from the condensing unit (the noisy, heat-producing side). The evaporator is placed inside the cellar, while the condenser can be located elsewhere in the home or even outside, resulting in a virtually silent cellar environment.
- Ducted Systems: For the most seamless integration, a ducted system allows the entire mechanical footprint to be hidden. Cool air is delivered to the cellar via insulated ductwork, allowing for complete design freedom and no visible equipment within the cellar itself. This is the gold standard for high-end, custom wine cellar design. For more details, explore our guide on choosing the best cooling systems for wine cellars.
Humidity and Vibration Management
Beyond temperature, two other factors are critical: humidity and vibration.
- Maintaining the Humidity "Sweet Spot": The ideal relative humidity for a wine cellar is between 50% and 70%. Too low, and corks dry out; too high, and you risk mold on labels and racking. Many professional cooling systems have integrated humidifiers or can be paired with one to maintain this perfect balance.
- Minimizing Vibration: Constant or significant vibration can disturb the sediment in aging wines, negatively impacting their flavor and maturation process. Professional cooling units are designed with vibration-isolating components. When choosing a location for the unit, ensure it is not subject to vibrations from other household appliances.
- Monitoring and Sensors: Modern systems often include integrated sensors and remote monitoring capabilities. These tools provide peace of mind, alerting you to any temperature or humidity fluctuations before they can damage your collection.
Racking and Layout Pitfalls: Designing for Today, Not Tomorrow
Your racking is more than just shelving; it’s the functional and aesthetic core of your cellar. Poor planning can lead to wasted space, damaged bottles, and an inability to grow your collection.
Common layout mistakes include designing for only one bottle size, forgetting to accommodate larger formats like Magnums and Champagne bottles, and creating poor traffic flow that leaves no room for case storage, decanting, or inventory management. Another frequent error is focusing solely on high-density, horizontal storage without including display rows. A "tasting row" or high-reveal display row breaks up the visual monotony and allows you to showcase your favorite labels without having to pull bottles out. For a deeper dive into racking possibilities, see The Definitive Guide to Custom Wine Racks.
Modularity and Future-Proofing Your Collection
Your collection will almost certainly grow over time. A cellar designed only for your current inventory will quickly become obsolete.
- Plan for Growth with Modular Racking: Racking systems like our Vintner Series are designed with modularity in mind. This allows you to start with a configuration that fits your current needs and budget, then seamlessly add matching components as your collection expands.
- The 80% Rule: A wise rule of thumb is to design your cellar to be 80% full with your current collection. This leaves you 20% capacity for future acquisitions, preventing the frustration of running out of space.
- Integrate Diverse Storage: A well-designed cellar includes a mix of storage types. Use individual bottle cradles for aging vintages, diamond bins or case storage for bulk buys and daily drinkers, and display rows for prized bottles.
Proper Bottle Orientation and Label Safety
How a bottle is stored directly impacts its longevity and condition.
- Keep Corks Moist: The primary reason for storing wine horizontally is to keep the wine in contact with the cork. This prevents the cork from drying out, shrinking, and allowing oxygen to seep into the bottle.
- Avoid "Label Rash": Racking made from rough, unfinished wood or poorly designed metal systems can scuff and tear labels, diminishing a bottle's value and aesthetic appeal. Opt for smooth-sanded wood with eased edges or high-quality, powder-coated metal.
- Embrace Traditional Density: For maximizing storage in a classic style, our Classic Series offers traditional wood racking that has been trusted by collectors for decades, ensuring both high capacity and label safety.
Modern Aesthetic Blunders: Glass, Metal, and Light
Contemporary wine cellars often feature expansive glass walls and sleek metal racking. While visually stunning, these modern materials introduce new technical challenges that are frequently overlooked.
The "goldfish bowl" error of using too much single-pane glass without proper thermal breaks or UV coating is a recipe for disaster. Glass has a very low R-value, and a glass-enclosed cellar can require two to three times the cooling power of a traditionally insulated one. Furthermore, exposure to UV light—from sunlight or even some types of interior lighting—can cause "light-struck" wine, triggering a chemical reaction that creates undesirable "wet cardboard" flavors. Even modern metal racking can be a source of trouble if not properly installed, as some systems can transmit vibrations more readily than wood.
Balancing Style with Protection
A modern design does not have to come at the expense of proper storage conditions. The key is to select materials engineered for the unique demands of a cellar environment.
- Combine Materials Intelligently: Systems like our Fusion Wine Walls masterfully combine the warmth of wood back panels with the modern appeal of metal racking, providing a sophisticated look without compromising on structural integrity.
- Use Thermally-Broken Glass and Doors: For any glass walls or doors, use double-paned, argon-filled, and UV-coated glass units. A thermally-broken frame is also essential to prevent condensation and energy loss.
- LED Lighting is the Only Choice: LED lights emit minimal heat and no UV radiation, making them the only safe lighting choice for a wine cellar. They can be used to create dramatic display effects without harming the wine.
Minimalist Racking Mistakes
Wall-mounted and cable-hung racking systems create a breathtaking "floating bottle" effect, but they require careful planning and structural support.
- Ensure Proper Backing: A full collection of wine is incredibly heavy. Racking systems like our Wine Peg Series must be anchored into solid wood backing (at least 3/4-inch plywood), not just drywall. Failing to provide adequate support is a catastrophic mistake.
- Consider Tension and Safety: Cable and glass suspension systems are highly technical. They require professional installation to ensure proper tensioning and safety, preventing sagging or failure over time. For more on this topic, consult our Ultimate Guide to Wall Mounted Wine Racks.
The Planning Process: When to Call the Master Craftsman
Perhaps the biggest mistake of all is treating the wine cellar as an afterthought in a new construction or remodeling project. By the time the drywall is up, it is often too late—or prohibitively expensive—to correctly install a vapor barrier or run dedicated electrical and drainage lines. A "DIY" approach, while tempting, frequently leads to costly retrofits when a fundamental principle of cellar construction was missed.
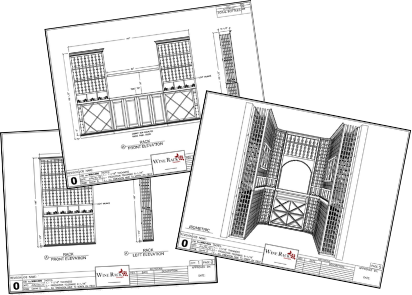
The value of a professional design consultation cannot be overstated. An expert can perform a proper thermal load calculation to size your cooling unit correctly, create a detailed CAD design to optimize your layout, and ensure that every structural detail is addressed before construction begins.
The Professional Design Workflow
A successful project follows a logical, step-by-step process that moves from vision to flawless execution.
- Step 1: Define Your Storage Goals: Determine the current and future capacity needs of your collection. Consider your collecting style—do you buy by the case or by the individual bottle? Do you need space for wood crates or large-format bottles?
- Step 2: Technical Site Survey: A professional will assess the proposed location for insulation requirements, access to adequate power, and a plan for condensate drainage from the cooling unit.
- Step 3: Custom Racking and Material Selection: Based on your goals and aesthetic, you can select the ideal racking system, whether it’s the modular Vintner series, the versatile Carpenter series, or the contemporary Fusion walls.
The Value of Expert Partnership and Quality Components
Building a wine cellar is a significant investment, and the quality of the components and the expertise of your design partner are paramount. Working with a US-based design team ensures clear communication and a deep understanding of domestic building codes and standards. This is particularly important for cooling systems, which must be engineered for US electrical grids to operate safely and efficiently.
Furthermore, an expert partner can guide you toward materials with proven durability, such as domestic hardwoods for racking or precision-engineered metal components. This consultative approach provides the peace of mind that comes from knowing your collection is protected by a thoughtfully designed, professionally specified system built to last.
By avoiding these common mistakes and partnering with experienced professionals, you can ensure your wine cellar is not only a beautiful showpiece but also a perfectly functioning sanctuary for your collection. A well-built cellar is a legacy, an asset that provides decades of enjoyment and protects your investment as it matures.
Ready to build it right the first time? Our team of experts provides professional CAD design services, high-quality racking and doors, and comprehensive climate control solutions to bring your vision to life. Start your custom wine cellar design with a professional consultation.
Have an expert help today!
Free 2D wine cellar design