Tension Cable Wine Racking Installation for Your Wall

*Pictures are renderings. Actual wine racks may look different
A tension cable wine racking installation guide starts with one essential rule: the wall and mounting points must support the rack and its loaded bottles. Solid structural backing is recommended, not drywall alone, and the right anchor depends on the wall construction. Plan cable positions carefully, then inspect the tension and hardware before loading the rack.
Cable racking has a clean, open look, but a polished display depends on sound preparation as much as design. This guide explains how to assess wall composition and load requirements, choose mounting points and anchors, and plan an adjustable layout for your space and bottle arrangement.
You'll also learn what to check during a final inspection, including cable tension, secure mounting points, and stable hardware. Working through each step in sequence helps create an intentional display that keeps your collection properly supported.
Key Takeaways
- Assess the wall and its structural backing against the combined weight of the rack and bottles before planning the layout.
- Choose mounting points that align with structural support, and position anchors according to the system's installation specifications.
- Plan cable height and bottle spacing around the ceiling, display orientation, and collection you want to store.
- Inspect cable tension, hardware, and mounting stability after installation, then check them periodically as part of ongoing care.
- When you want a wall display tailored to your space, Wine Rack Concepts' Wall Wine Rack Series can be a natural next step.
Table of Contents
Assessing wall composition and load-bearing requirements
Identify the wall layers and assess the rack's intended bottle load before choosing supports. In the United States, permit requirements depend on location and project scope, particularly when work goes beyond attaching the rack.
Wall Composition Assessment
Start with the finished wall, then determine what lies behind its surface. Drywall, masonry, and plywood provide different kinds of support, so the visible finish alone cannot establish whether a mounting point is suitable. Review construction drawings or accessible areas to identify the wall assembly and structural backing. Record your findings before marking cable positions.
Drywall alone is not the recommended support for a cable rack. Solid structural backing or a reinforced surface gives the mounting points a stronger base. For the Float wine racking system, 3/4-inch plywood is recommended as structural backing. That detail helps define the assessment: identify whether backing is present, where it sits, and whether it covers the planned installation area.
Wall location matters, too. Interior walls are preferable for wine storage because temperature and humidity fluctuations near exterior walls can affect preservation. If the display will be against an exterior wall, consider those environmental conditions alongside the wall's structure. Masonry can provide greater support than drywall for expansive configurations, but mounting points must still suit the system's installation requirements.
Ceiling conditions belong in the same site review. Typical installation parameters allow a ceiling height of up to 10 feet. If a ceiling crown affects the mounting area, the manual specifies 3/4-inch plywood. Check how the crown, wall finish, and available backing meet before fixing the final cable layout.
Load-Bearing and Permit Requirements
Evaluate the combined load of the rack and its intended wine collection. A Cable Wine Rack section holds up to 20 standard 750-milliliter bottles, so the planned number of sections affects the total supported load. Include every intended bottle position in the assessment, rather than treating an empty rack as the final condition.
Match the intended load to the wall construction and structural backing. A rack should not rely on drywall alone; its mounting arrangement needs suitable solid backing or reinforcement. Masonry can provide greater support than drywall for an expansive layout. Assess whether the wall and rack configuration work together before installation begins.
Permit requirements are not the same nationwide. They depend on the installation location and whether the work goes beyond attaching the rack, such as altering structural framing. Assess these questions separately from the rack's load requirements, and account for local rules if the project includes building work.
Finally, compare the planned installation with the applicable system instructions. The Float system's 3/4-inch plywood recommendation and the 10-foot typical ceiling parameter are specific reference points, not substitutes for assessing the actual wall. A sound evaluation connects the wall material, backing, ceiling conditions, and fully loaded rack plan before mounting points are set.
Choosing mounting points and anchors
Choose mounting points only after you understand the rack layout and wall structure. The manufacturer's specifications determine anchor positions, while the wall material determines the appropriate fasteners.
Useful tools and materials include a stud finder, tape measure, level, drill, pilot bit, and system hardware. A laser level can help align an extended layout, while a paper template transfers hole positions, especially across multiple racks. Use a tension cable wine racking installation guide to coordinate measurements with the selected system's instructions.
Measure the installation area, mark proposed cable positions, and compare them with the system specifications. Leave room for bottle supports and access. A cardboard template helps align repeated mounting points. Before drilling, confirm that the marks meet structural backing and suit the intended layout.
Locate wall studs where the layout allows, then align mounting points with the rack instructions. For hollow walls, heavy-duty toggle anchors with weight distribution plates can be used. However, drywall alone is not the recommended support for the Cable Wine Rack System. For masonry, use anchors suited to the material. Stainless steel hardware is recommended in wine cellars because it resists corrosion in fluctuating moisture.
Install components in sequence, following the system instructions:
- Mark each support plate position using the specified layout dimensions.
- Drill pilot holes before installing anchors or screws to help prevent wall damage.
- Secure mounting plates with fasteners suited to the backing and system requirements.
- Attach cable hardware, then fit cables and bottle supports in the order specified by the manufacturer.
- Use specialized tensioning tools to keep cables taut and a calibrated gauge to set cable tension when required.
Do not substitute drywall anchors when the system calls for solid backing or a reinforced surface. Match each anchor to the substrate and mounting point, and follow the manufacturer's specifications for brackets and fasteners. A tension cable wine racking installation guide should coordinate wall marks, compatible anchors, and assembly order, rather than treating them as separate decisions.
After assembly, check alignment and tension before loading bottles. Increase the load gradually while monitoring the mounts and hardware. For a multi-column layout or a challenging wall, a design plan can help coordinate the rack with the room and collection.
Locate wall studs to create secure mounting points. Mark rack mounting points according to the manufacturer's specifications, then verify that each mark aligns with suitable backing and that the fastener matches the wall material. This keeps the planned positions consistent with both the rack requirements and the supporting structure.
The Cable Wine Rack manufacturer recommends mounting to solid structural backing or reinforced surfaces rather than drywall alone. For drywall installations, use robust anchoring systems. Before drilling, confirm that the anchors suit the wall and intended mounting points, and follow the rack instructions for placement. If you are unsure about the backing or anchor choice, pause until it has been assessed. Careful positioning cannot make inadequate support secure.
Modular and adjustable installations
A cable layout can be planned around ceiling height, bottle orientation, and display features. The Cable Wine Rack System adjusts to a maximum height of 118 inches, approximately 3 meters.
Map the available wall and ceiling dimensions, then decide where each cable column will sit. The Cable Wine System allows customer-preferred bottle spacing and positioning, accommodating a wide variety of bottle shapes and sizes. Plan spacing around the bottles you intend to display instead of assuming every collection uses the same format.
Ceiling height sets a practical boundary for the layout. The Cable Wine Rack System adjusts up to 118 inches, approximately 3 meters. The Float wine racking kit supports ceiling heights up to 12 feet, and its cables can be cut to fit lower ceilings. These are different system specifications, so use the measurements for the selected system when planning the installation.
Bottle orientation affects the space each column needs. In label-forward orientation, the Float wine racking system is 8 inches wide, and at least 13 inches per column is recommended because bottles extend wider than the rack. In neck-forward orientation, the system is 6 3/4 inches wide. Account for that difference when laying out adjacent columns or fitting a display into a narrow area.
Capacity and bottle size also shape the spacing plan. The Float system holds 12 standard 750 ml bottles or 12 1500 ml bottles. Slightly greater spacing is recommended for 1500 ml bottles. If the collection includes different formats, position supports to suit the intended bottles and leave room for comfortable placement and removal.
Modularity can add display variety beyond bottle rows. Floating shelves or angled displays can be added to the Cable Wine System. Decide where these features will go before fixing the layout, so they complement bottle positions without interrupting access. A paper plan can show how the shelves, angled displays, and cable columns will relate.
Before installation, compare the layout with the system's height and spacing limits. Mark cable positions, check bottle clearance, and confirm that each added feature fits the arrangement. For example, a narrow wall may suit neck-forward bottles, while a label-forward display needs additional column width. Planning these details on paper helps keep the finished rack balanced and usable.
Post-installation inspection and maintenance
Common risks include loose mounting hardware, uneven cable tension, and loading bottles before checking the empty rack. Inspect the mounting points and cables first, then increase the load gradually while watching for movement. A tension cable wine racking installation guide can help organize the final inspection, but the selected system's instructions govern its components.
Start with the empty rack. Compare the installation with the manufacturer's instructions, checking that cables sit correctly in their fittings and bottle supports are attached properly. Inspect the full display, not just one column. A level arrangement can reveal a shifted support or a cable that appears slack beside its neighbors.
During inspection, focus on the parts that carry or position the bottles:
- Mounting points: Look for movement, visible gaps, or hardware that has shifted from its original position.
- Cables: Check for tautness and consistent alignment from one support point to the next.
- Hardware: Examine fittings and fasteners for looseness, corrosion, or visible damage.
- Bottle supports: Confirm each support remains correctly seated and positioned on its cable.
Next, test the installation by adding weight gradually. Place bottles across the rack in stages, monitoring the mounting points, cables, and hardware as the load increases. If a support moves or the cables lose their intended alignment, stop adding bottles. Correct the issue according to the system instructions before continuing.
Uneven loading can make a problem harder to spot. For example, filling one side while leaving the other empty may reveal shifting that a balanced arrangement would not. Distribute bottles across the planned positions during the test. Watch for changes in cable tension, mount stability, or bottle-support alignment as you add weight.
Once the rack is loaded, inspect the hardware, cable tension, and mounting points periodically. Look for changes since the previous check, such as a loose fitting or a cable that no longer appears evenly tensioned. A tension cable wine racking installation guide can help organize checks by rack component. If you alter or rearrange the rack, inspect the affected cables and supports before returning bottles to those positions.
Moisture matters in wine cellars. Stainless steel hardware is recommended because it resists corrosion where moisture levels fluctuate. During each inspection, check exposed fittings for corrosion and note any changes. Follow the manufacturer's instructions for compromised components rather than continuing to load visibly damaged hardware.
Written maintenance notes can make periodic checks more consistent. Record the date, areas inspected, and any adjustments made. Comparing notes can reveal recurring changes, such as a cable that repeatedly loses tension or a mounting point that shifts after loading.
Wine system installation support
Complex cable layouts require coordinated framing, accurate marks, and controlled tension. The installation sequence below follows key manual dimensions for a tension cable wine system. The selected system's instructions govern its specific components.
Start above the planned rack location. The manual specifies installing 2-by-4-inch blocking between the floor joists. This gives the top tension support plates structural backing. Secure each plate through the finished cladding and into at least 2 inches of blocking. For each tension set, the manual lists six 2-inch #8 wood screws, or equivalent, to secure the top plates.
Accurate layout marks help keep multiple cables aligned. A laser level can establish a consistent horizontal reference across an extended display. A cardboard or paper template helps transfer hole positions, especially when several racks share one wall. The manual specifies placing back-row base tension support plates at least 3 inches from the wall, with 5-inch center-to-center spacing. Front-row tension support plates use 7 1/2-inch center-to-center spacing.
Use the installation sequence to preserve those measurements:
- Position and mark the base and top support plates using the system's layout dimensions.
- Drill pilot holes before fastening the plates, reducing the chance of wall damage.
- Secure the top plates through the cladding and into the blocking with the specified screws or equivalent.
- Set the first back-row horizontal cable line 5 inches above the finished floor. Place later back-row clamp locations at least 4 1/2 inches center to center.
- Position front-row clamps 1 inch higher than their back-row counterparts. Set the first front-row horizontal line 6 inches above the finished floor, then follow the back-row intervals, maintaining at least 4 1/2 inches center to center.
Before final tensioning, compare the installed supports with the layout marks. The manual instructs turning the top tension support cap four complete turns, loosening it by 1/4 inch. Use the system's instructions for this adjustment rather than applying the same movement to unrelated fittings. Specialized tensioning tools help maintain taut cables, while calibrated tension gauges set cable tension. Attach mounting brackets using the appropriate torque specifications.
Uneven walls may need shimming so supports sit correctly. Recheck alignment after any adjustment. Then increase the load gradually while monitoring mounting stability and hardware. This final sequence connects framing, fasteners, cable geometry, and tension before the display carries your collection.
Wine Rack Concepts: Wall Wine Rack Series
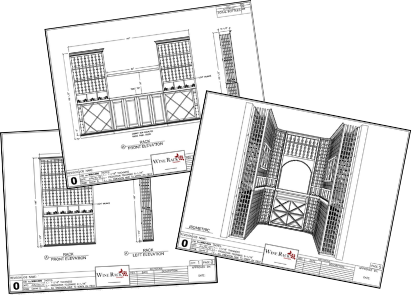
Wine Rack Concepts, LLC can help plan a wall display with its Wall Wine Rack Series. If your measurements, wall conditions, or collection call for a broader design, a Custom Wine Cellar can bring storage into the wider room plan. Wine Cellar Cooling may also suit a cellar project that includes climate control.
Consider the Wall Wine Rack Series for a dedicated wall display, or explore a custom cellar if your layout involves multiple storage needs. The right direction depends on your space, collection, and preferred bottle presentation.
Contact Wine Rack Concepts, LLC to discuss your wall wine storage plans.
Make the Wall Display Part of Your Cellar Plan
A cable display can be more than a place to store bottles. Its position, visual rhythm, and relationship to nearby finishes help shape the room around your collection. Use this tension cable wine racking installation guide as a starting point, then consider how the display should serve your space as your collection changes.
Wine Rack Concepts offers wine racks, Wine Cellar Cooling, and Custom Wine Cellar solutions. If your plans extend beyond a single wall, these options can help shape the broader design. Consider how the rack will relate to the room, how you want bottles presented, and whether the surrounding cellar should support a larger vision.
A considered plan turns technical decisions into a display that feels at home in your space. Take the next step when you're ready to design yours.
Frequently Asked Questions
What is a tension cable wine racking system and how does it work?
A tension cable wine rack suspends bottle supports from taut vertical cables secured between mounting points. The supports hold bottles along the cables, creating an open display rather than enclosed cubbies. Cable systems can accommodate preferred bottle spacing and positioning, so the layout can suit different bottle shapes and display preferences. The exact arrangement depends on the system components and its installation instructions.
What wall and ceiling structures can support tension cable wine racking?
Solid structural backing, reinforced framing, and masonry can support mounting points when the selected system's requirements are followed. Drywall alone is not the recommended base. At the ceiling, blocking installed between floor joists can provide structural attachment for top supports. The planned layout must align with that backing, and the ceiling height must fit the selected system's limits. Wall material and installation details determine the appropriate mounting arrangement.
How do you calculate the load capacity and choose appropriate anchors?
Count the intended bottles and rack sections, then compare the planned load with the system's stated capacity. A Cable Wine Rack section holds up to 20 standard 750-milliliter bottles. Do not use bottle count alone to determine anchor capacity: the wall material, structural backing, load distribution, and manufacturer's mounting specifications all matter. Select anchors suited to the substrate and specified installation, rather than relying on drywall alone.
How do you maintain and inspect a tension cable wine rack after installation?
Inspect the cables, fittings, supports, and mounting points periodically, and repeat the inspection after changing the layout or loading bottles. For example, check that supports remain seated after rearranging bottles, and look for corrosion where cellar moisture fluctuates. Compare cable alignment and hardware condition with the system's installation instructions. If a component appears damaged or shifted, remove the load from the affected area before addressing it.
Have an expert help today!
Free 2D wine cellar design