How to Turn a Closet into a Professional Wine Cellar

*Pictures are renderings. Actual wine racks may look different
A standard spare closet is often overlooked as a place for coats or forgotten boxes, yet it actually possesses the architectural potential of a professional-grade wine sanctuary. You might worry that such a confined space will lead to moisture damage or that a cooling unit might disrupt the quiet of your home. These are valid concerns, as the difference between a simple storage room and a high-performance cellar lies in the meticulous engineering of a perfect thermal envelope. If you're wondering how to turn a closet into a wine cellar that truly protects your investment, you aren't alone in seeking a balance between sophisticated aesthetics and technical precision.
We understand that every bottle in your collection represents a story worth preserving. In this article, you'll learn the essential steps to transform any standard closet into a climate-controlled environment that rivals professional vaults. We provide a clear roadmap for construction, covering everything from proper vapor barrier placement to selecting specialized racking series like our Vintner or Fusion lines. You'll discover how to maximize your storage capacity in a small footprint while creating a beautiful display that adds lasting value to your home.
Key Takeaways
- Understand how to evaluate your home's layout to determine if an interior or exterior wall location is best for your collection's long-term safety.
- Discover the technical secrets of how to turn a closet into a wine cellar by creating a professional-grade thermal envelope using specialized vapor barriers.
- Learn the precise methods for calculating cubic footage to select the ideal cooling unit that ensures consistent temperature and humidity control.
- Explore ways to maximize every vertical inch of a small footprint using specialized racking series to increase bottle capacity and visual appeal.
- Identify the critical finishing touches, from exterior-grade doors to UV-free LED lighting, that protect your investment while enhancing your home's value.
Assessing Your Closet for Wine Storage Feasibility
A spare closet represents a blank canvas for any serious collector. While it may currently house linens or old coats, its transition into a professional storage environment requires a strategic look at its physical and environmental properties. Learning how to turn a closet into a wine cellar begins with a thorough assessment of your home's existing architecture. Before you begin demolition, you must measure the clear height and depth to ensure your vision aligns with the physical reality of professional racking systems. Most standard racks require a minimum depth of 13.5 inches to accommodate 750ml bottles safely, so verifying these dimensions early is essential for a seamless installation.
Interior vs. Exterior Wall Considerations
The location of your closet within your home's layout significantly impacts the efficiency of your climate control system. Interior walls are generally superior for wine storage because they are surrounded by other temperature-regulated rooms, providing a natural buffer against external weather shifts. If your chosen closet shares a wall with the outdoors, it faces constant heat gain from solar radiation. This scenario demands higher R-value insulation and a more robust vapor barrier to prevent the cooling unit from overworking. Additionally, you should consider the floor's structural integrity. A full collection of 200 bottles can weigh several hundred pounds, so verifying that the subfloor is level and capable of supporting concentrated weight is a non-negotiable first step in how to turn a closet into a wine cellar.
Utility and Electrical Requirements
Reliable climate control is the heart of a professional cellar. Most self-contained refrigeration units require a dedicated electrical circuit to ensure consistent power without the risk of tripping a breaker shared with high-draw appliances. You should also identify the proximity of existing plumbing if you plan to install a system that requires a condensate drain line. While some units evaporate moisture internally, others need a path for excess water to exit the space. Planning for these technical requirements early prevents costly mid-project modifications. If you're unsure about the electrical capacity of your space, contacting a design specialist can clarify whether your current panel can support the added load of cooling and UV-free LED lighting systems.
Creating the Thermal Envelope: Insulation and Vapor Barriers
Stripping the space down to the wall studs is the only way to ensure a clean, professional starting point. When people ask how to turn a closet into a wine cellar, they often overlook the hidden engineering required behind the drywall. You must create a complete thermal envelope that isolates the cellar's climate from the rest of the home. This process begins with a 6-mil plastic vapor barrier, which acts as a shield against moisture migration. By sealing all penetrations, such as electrical outlets and light fixtures, with high-quality spray foam, you prevent air leaks that could lead to mold or temperature fluctuations.
The Role of the Vapor Barrier
A vapor barrier is essential because it prevents warm, moist air from meeting the cool air inside the cellar. If this barrier is missing or installed incorrectly, condensation will form inside the walls, eventually leading to structural rot or mold growth. The barrier must be installed on the warm side of the insulation, which is the side facing the exterior of the wine room. You should overlap all seams by at least 12 inches and seal them with moisture-resistant tape to maintain a continuous, airtight seal that protects both your wine and your home's structure.
Insulation Standards for Small Spaces
High-performance insulation is what keeps your cooling unit from running constantly. While fiberglass batt insulation is a traditional and cost-effective choice, closed-cell spray foam is often preferred because it provides a higher R-value per inch and acts as its own vapor barrier. For a standard closet conversion, you must achieve a minimum of R-19 insulation in the walls and R-30 in the ceiling to maintain the required 55 to 58 degree environment. Once the insulation is in place, installing moisture-resistant green board instead of standard drywall provides an added layer of protection against the cellar's high humidity levels. If you have questions about the specific materials needed for your layout, speaking with a cellar consultant can help you avoid common construction pitfalls.
The final step in creating your envelope is ensuring every gap is accounted for. Even a small opening around a light fixture can allow enough heat transfer to disrupt the delicate balance of your cellar. Using a combination of rigid insulation and expanding foam ensures that no thermal bridges exist. This methodical approach to the wall assembly creates a stable foundation for the aesthetic elements that will follow, ensuring your collection remains protected for decades to come.
Selecting the Right Wine Cellar Cooling System
Choosing a cooling system is a decision that impacts the longevity of your entire collection. When planning how to turn a closet into a wine cellar, you must treat the cooling unit as the heart of the project. Calculating the cubic footage of your closet is the first technical step. You find this by multiplying the length, width, and height of the space, but you must also account for heat gain factors like glass doors or shared exterior walls. A unit that is too small will run constantly and fail prematurely, while an oversized unit may cause rapid temperature swings that stress the corks.
Self-Contained Refrigeration Units
These all-in-one systems are the most common choice for closet conversions because they are relatively straightforward to install. A self-contained refrigeration unit typically mounts through the wall, requiring a precise rectangular cutout and a dedicated electrical outlet. It's vital to remember that these units must exhaust heat and noise into an adjacent, well-ventilated room that is at least twice the size of the cellar. To maintain peak efficiency, you should inspect and clean the condenser coils every few months to prevent dust from obstructing airflow and stressing the compressor.
Split Systems for Ultimate Silence
If your wine room is located near a bedroom or a formal living area, a split system is often the superior choice. Unlike self-contained models, a split system separates the evaporator coil from the condenser. The mechanical components that produce the most noise are placed outdoors or in a remote utility room, leaving the closet virtually silent. This setup offers a significant aesthetic advantage because it eliminates visible mechanical bulk inside the cellar. Because these systems involve pressurized refrigerant lines, they require a licensed HVAC technician to ensure a safe and professional installation.
Noise levels are a primary concern for many homeowners. Most self-contained units operate at decibel levels similar to a standard kitchen refrigerator, though selecting a model with adjustable fan speeds can help manage sound in quiet homes. Regardless of the system type, the ultimate goal is to maintain a consistent environment of 55 to 58 degrees with a relative humidity between 50 and 70 percent. A properly sized and vented unit ensures your collection ages gracefully, protecting the subtle nuances of every bottle. If you're unsure which configuration fits your home's layout, consulting with a cooling specialist can help you determine the most efficient path forward for your specific space.
Maximizing Bottle Capacity with Custom Racking Systems
Once the thermal envelope is complete, the focus shifts to the internal architecture of your space. Figuring out how to turn a closet into a wine cellar requires a layout that utilizes every available inch of vertical and horizontal room. You should map out your racking to reach the ceiling, as vertical storage is the most efficient way to maximize capacity in a small footprint. Incorporating bulk storage bins at the bottom of the racks allows for case storage, while individual bottle holders above keep your curated selections organized and accessible. This balanced approach ensures that your cellar is as functional as it is beautiful.
Traditional Wood Racking Series
For those who prefer a timeless aesthetic, the Vintner Series offers a modular approach that fits nearly any closet dimension. It's vital to choose materials that thrive in a 55-degree, 60% humidity environment. Redwood and Mahogany are excellent choices because they possess natural resistance to rot and mildew. These woods also age beautifully, developing a rich patina over time. You can integrate horizontal display rows within these racks to showcase label art, breaking up the visual repetition of standard bottle necks and adding a touch of gallery-style sophistication to the room.
Modern Metal and Fusion Wine Walls
If your home features a more contemporary design, modern wine wall displays provide a minimalist look that feels airy despite high bottle density. Metal pegs allow for label-forward storage, making it easy to find a specific vintage without pulling bottles from a rack. For a truly unique result, our Fusion Wine Walls mix wood and metal elements, bridging the gap between classic warmth and modern precision. This hybrid approach allows you to customize the textures and colors of your cellar to match your personal style while ensuring every bottle is securely supported by professional-grade hardware.
The success of your cellar depends on how well the racking adapts to your collection's growth. A well-planned layout ensures that you don't run out of space as you acquire new cases. By combining individual bottle racks with bulk storage, you create a versatile environment that can handle everything from standard 750ml bottles to larger magnums. This level of planning is a key part of how to turn a closet into a wine cellar that remains functional for years to come.
Finishing Your Closet Transformation with Professional Grade Details
The final phase of your conversion is where functional engineering meets high-end design. While the internal structure is now sound, the finishing details determine whether the space feels like a utility closet or a luxury destination. Learning how to turn a closet into a wine cellar involves selecting materials that can withstand 60% humidity without degrading over time. Flooring choices like slate, porcelain tile, or sealed cork are ideal because they don't absorb moisture or harbor mold. To ensure your collection remains safe, integrating a digital monitoring system provides real-time temperature and humidity alerts to your smartphone, offering peace of mind when you're away from home.
The Essential Wine Cellar Door
A common mistake in many home projects is keeping the original hollow-core interior door. These doors are designed for standard climate-controlled rooms and will quickly warp or rot when exposed to the temperature differential of a cellar. A professional installation requires an exterior-grade door with an insulated core to maintain the thermal seal. Metal wine cellar doors featuring dual-pane tempered glass are an excellent choice, as they provide a clear view of your collection while maintaining a thermal break. You must also ensure a complete seal by installing an automatic door bottom and a tight-sealing threshold to prevent cool air from escaping along the floor.
Lighting and Final Aesthetics
Lighting is more than a design choice; it is a preservation requirement. You should exclusively use LED fixtures because they produce minimal heat and zero UV rays, both of which can damage wine during long-term storage. Recessed LED strips are particularly effective for highlighting custom wine racks, creating a soft glow that emphasizes the wood grain or metal finish. If space allows, you can create a focal point with a small tasting niche or a stone accent wall to add texture and depth. Before you begin loading your bottles, perform a final check of the door seal and allow the cooling unit to run for 48 hours to ensure the environment has stabilized.
By following these final steps, you've completed the roadmap on how to turn a closet into a wine cellar that functions at a professional level. This methodical approach to finishing touches ensures that your project is a success and adds lasting value to your property. By focusing on the details that competitors often overlook, you create a space that is as durable as it is beautiful. Whether you are showcasing a handful of rare vintages or a growing collection, these professional-grade details elevate the entire experience for years to come.
Bringing Your Professional Wine Sanctuary to Life
Transforming an underutilized closet into a high-performance cellar is a rewarding journey that adds both personal joy and home value. The process relies on a foundation of proper insulation and a dedicated vapor barrier to protect your collection from the elements. Mastering how to turn a closet into a wine cellar requires balancing these technical requirements with a racking layout that maximizes every available inch. By focusing on professional-grade cooling and durable components, you create a stable environment where your vintages can age gracefully for years to come.
We are here to act as your expert guide throughout this transformation. We offer custom designs for any closet size and specialized cooling solutions that meet the highest industry standards. Our goal is to bridge the gap between your initial vision and a finished, professional result that reflects your unique style as a collector. Whether you prefer traditional wood or modern metal, we ensure your storage is built to last.
Your ideal wine room is closer than you think. With a methodical plan and the right materials, that spare closet will soon become the sophisticated heart of your home.
Frequently Asked Questions
Can I turn a closet into a wine cellar without a cooling unit?
You can create a passive storage area without a cooling unit if the space naturally stays below 65 degrees and remains dark. However, learning how to turn a closet into a wine cellar for long-term aging usually requires active refrigeration. Without a dedicated unit, you risk exposing your collection to seasonal temperature shifts that can cause the wine to age prematurely or the corks to fail.
How much insulation do I need for a closet wine cellar?
You should use a minimum of R-19 insulation for the walls and R-30 for the ceiling to ensure maximum thermal efficiency. This level of protection prevents heat from leaching into the cellar and keeps your cooling system from running too frequently. Combining these R-values with a properly installed vapor barrier creates a stable environment that protects the delicate chemical balance of your wine collection over many years.
Do I need a special door for my wine closet?
You definitely need an exterior-grade, insulated door to maintain the necessary seal for your wine room. A standard interior hollow-core door will quickly warp due to the temperature and humidity differences between the cellar and the rest of your home. Choosing a door with a tight-sealing threshold and an automatic bottom ensures that your cooling unit operates efficiently without constant air leaks.
What is the best type of racking for a small closet?
The best racking for a small footprint is often a modular system that utilizes every inch of vertical wall space. Our Vintner Series is a popular choice because it adapts to various heights and depths while providing a classic look. If you want to maximize capacity in a very narrow closet, metal pegs or label-forward displays can help you fit more bottles while keeping the labels visible.
How do I prevent mold in my wine closet?
Preventing mold starts with the installation of a 6-mil polyethylene vapor barrier on the warm side of your insulation. This barrier stops moisture from migrating through the walls and condensing in the cool air of the cellar. You should also use moisture-resistant materials like green board and stone or tile flooring. These choices ensure that the high humidity required for your corks doesn't lead to structural damage.
Can I use a standard air conditioner for my wine cellar?
You cannot use a standard air conditioner because it isn't designed to reach the 55-degree mark or manage humidity properly. A household AC unit strips moisture from the air, which can dry out your corks and lead to oxidation. Dedicated cellar cooling units are engineered specifically to maintain a consistent temperature while keeping the relative humidity between 50 and 70 percent, which is critical for long-term storage.
How many bottles can I fit in a standard 2x4 closet?
A standard 2x4 closet can typically accommodate between 50 and 300 bottles depending on your racking design and bottle sizes. To reach the higher end of that capacity, you should plan for floor-to-ceiling individual bottle racks and use bulk storage bins for cases at the bottom. Customizing the layout ensures that you don't waste any space, allowing even a small closet to hold a significant collection.
What is the total cost to convert a closet into a wine cellar?
The total investment depends heavily on your choice of racking and the specific cooling unit required for your home's layout. Industry data indicates that a professional closet conversion typically ranges from $5,000 to $15,000. This estimate covers the necessary structural changes, such as the vapor barrier and insulation, alongside the professional-grade details that define how to turn a closet into a wine cellar that adds value to your property.
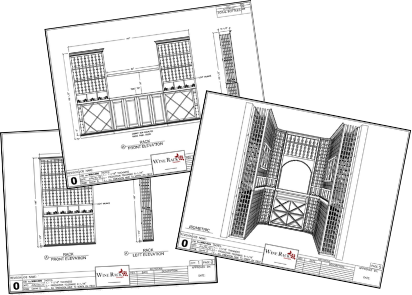
Have an expert help today!
Free 2D wine cellar design