How to Rack Wine into Half Bottles Without Oxidation or Contamination
*Pictures are renderings. Actual wine racks may look different
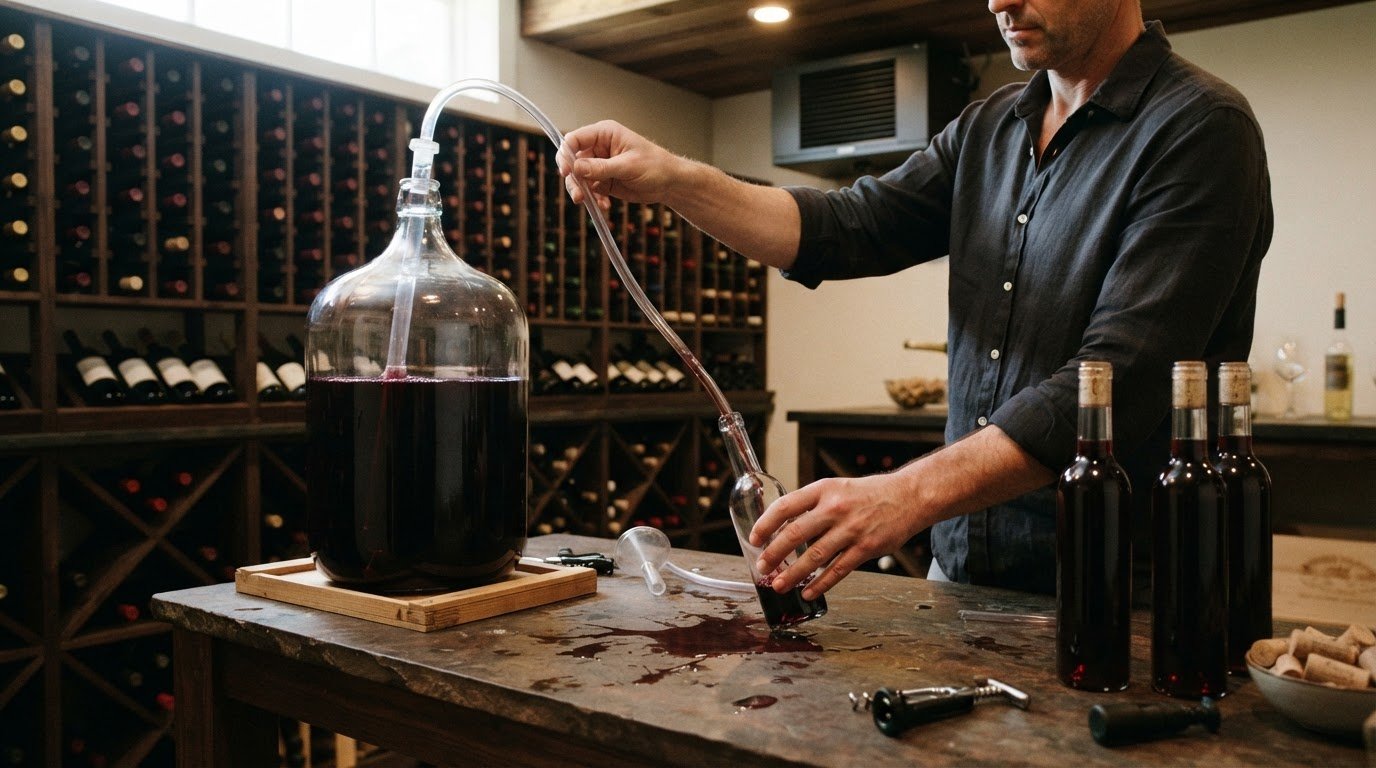
A careful transfer matters more when you're filling smaller bottles. Wine racking for half bottles means sanitizing the equipment, starting a gentle siphon, and filling each bottle with as little splashing as possible. A 375 ml bottle is a half bottle; keep the wine moving smoothly and close each bottle promptly to limit oxygen exposure and contamination.
It's easy to focus on bottle size, but preparation matters just as much. Clean, sanitized bottles and transfer equipment help protect the wine, while a steady flow limits unnecessary contact with air. An auto-siphon racking cane can start gravity flow with one or two strokes, so you can begin the transfer without blowing into the tubing.
This guide covers the process from setup to sealing, with practical checks to keep the transfer controlled and hygienic. Learn how to prepare bottles and equipment, position the siphon, fill without splashing, and finish each bottle cleanly. Whether you're preserving a small portion or dividing a larger batch, careful handling helps the wine retain its character.
Key Takeaways
- Set up a clean, stable bottling area before transferring wine, and keep sanitized closures within reach.
- Keep the siphon outlet positioned to reduce splashing, and pause if the flow becomes uneven.
- Fill bottles consistently, leaving appropriate room for the closure and minimizing the wine's contact with air.
- Choose storage that supports your collection's bottle sizes, access needs, and cellar layout.
- Consider how a custom wine cellar and cooling can support an organized space for bottles of different formats.
Table of Contents
How do you rack wine into 375 ml half bottles step by step?
A 375 ml bottle is a half bottle, while a 187 ml bottle is a split. Work in a clean area, prepare each bottle before starting the siphon, and keep the transfer controlled from the source vessel to the closure.
- Choose the bottles and closures. Set out clean 375 ml bottles that suit the wine and the closures you plan to use. Check each bottle for chips, cracks, residue, or an odor before filling. Remove any damaged bottle from the work area, so it cannot interrupt the transfer or compromise the finished batch.
- Clean the work surface and equipment. Wash the racking cane, tubing, bottling wand if used, and any funnel or measuring tool that will touch the wine. Remove visible residue first, because sanitizer works best on clean equipment. Place prepared tools on a clean surface, not directly on the cellar floor or counter.
- Sanitize every wine-contact surface. Prepare a food-safe sanitizer according to its label, then wet the interior and contact surfaces of each bottle, cane, tube, and closure-handling tool. Follow the product directions for contact time and draining. Avoid touching sanitized bottle mouths or the insides of closures with unclean hands.
- Arrange bottles within easy reach. Set the bottles upright on a stable surface below the source vessel, with room to work around each neck. Keep closures nearby, away from possible splashes. This setup lets you move from bottle to bottle without carrying an open one across the room.
- Position the source wine carefully. Keep the vessel steady and position the siphon inlet so it draws wine without scraping the bottom. If sediment has collected, leave it undisturbed. Drawing lees or settled particles into the tubing can cloud the wine and leave unwanted material in the half bottles.
- Set the racking cane and tubing. Attach the tubing securely to the cane, then place the cane inlet in the wine above any sediment. Aim the tubing outlet toward the bottom of the first bottle. Racking-cane tubing is usually about six feet long, so lay it out without kinks or loose loops.
- Start the siphon without mouth contact. An auto-siphon racking cane can start gravity flow with one or two strokes. Keep hands and unclean surfaces away from the cane tip and tubing outlet. Once wine begins moving, watch the connection and flow closely; stop if the tubing slips, leaks, or draws air.
- Fill the first bottle from the bottom. Guide the outlet down into the 375 ml bottle and keep it near the bottom as wine enters. Let the rising wine meet the stream gently instead of pouring from above. This method limits splashing, which can increase the wine's exposure to oxygen during transfer.
- Leave room for the closure. Watch the wine level and stop filling before it reaches the rim. Leave suitable headspace for the closure, following the bottle and closure maker's directions. Avoid topping up from an open vessel, which adds another transfer and more opportunity for splashing.
- Repeat the fill consistently. Move the sanitized outlet to the next bottle and repeat the same controlled fill. Keep each bottle upright and stable, and don't let the tubing touch the floor or an unclean surface. If the flow becomes uneven, pause and correct the tubing before continuing with the next 375 ml bottle.
- Close and identify each bottle. Seal each filled bottle promptly with a clean, compatible closure, following its instructions. Wipe wine from the neck before closing, then label the bottle with its contents and bottling details. This final step in wine racking for half bottles keeps the transfer orderly and makes bottles easy to distinguish.
The 25-Bottle Elite Kit Rack is designed to hold 25 half-bottles of 375 ml each. Its bottle depth is 133½ inches, it is 85 inches tall, and it is 4 1/2 inches wide. These dimensions provide a basis for checking whether the rack fits the available storage space before choosing it for a batch.
The rack's production time is 2-3 weeks. That pickup detail may be useful when weighing local collection against shipping.
Your wine
- Measure the bottles you actually store. A 375 ml half bottle is shorter than a standard 750 ml bottle, but its shape still affects fit. Measure the height and widest point of your bottles, including any unusual shoulders. Record the measurements before planning shelves, so each opening supports the bottle without forcing it into place.
- Check your current rack before adding bottles. A basement rack designed only for 750 ml bottles may not hold half bottles securely. Compare the opening depth and spacing with your 375 ml bottles. If the smaller bottles sit loosely or cannot rest safely, keep them separate until you have a suitable storage position.
- Decide whether to mix bottle sizes. A slot sized for one 750 ml bottle can fit about 1.5 half bottles when they are tucked between full-size bottles. Use that arrangement only when each bottle remains supported and accessible. Don't wedge glass tightly together, since retrieving one bottle should not shift neighboring bottles.
- Set aside dedicated half-bottle space. A separate section makes it easier to identify smaller formats and return them to the same place after use. One cellar owner stored half bottles three deep in a cabinet section, which held 162 bottles. Treat that as a layout example, then assess reach, support, and visibility in your own cellar.
- Plan depth around access, not capacity alone. Storing bottles three deep can increase capacity, but rear bottles are harder to reach. Put bottles you plan to open sooner near the front, and reserve deeper positions for those you expect to leave undisturbed. Keep labels visible where possible, so choosing a bottle doesn't require moving several others.
- Use a cooler slot only when the fit is stable. A wine cooler may fit three half bottles in a double-deep slot. Arrange them so the front bottle can slide out without pressing against the bottles behind it. Check that the door closes freely and each bottle remains supported when the rack moves.
- Compare columns before changing the layout. A configuration that cannot fit two columns of 750 ml bottles may fit two columns of 375 ml bottles. Sketch the rack face with bottle widths and access space included. This helps reveal whether smaller bottles can use an existing area without blocking full-size bottles.
- Group bottles by how you use them. Sort half bottles by wine type, drinking occasion, or opening order. For example, group dessert wines together and place bottles reserved for a dinner near the front. A consistent arrangement reduces handling and makes it easier to return each bottle to its designated section.
- Match the storage plan to your collection. Count the half bottles you own, note the full-size formats sharing the cellar, and identify which bottles need the easiest access. A simple drawing can show where dedicated rows, mixed-size slots, or deeper storage make sense. If you're planning a cellar around different bottle formats, a custom cellar design can help organize the layout around your collection.
Wine Rack Concepts
Wine Rack Concepts can help you plan storage around a collection that includes half bottles and standard formats. If your existing rack leaves smaller bottles unstable or hard to reach, a custom wine cellar can be designed with your collection and room layout in mind. The Wall Wine Rack Series and Classic Series offer additional rack options to consider as you organize your bottles. Wine Cellar Cooling can also be part of a cellar plan where maintaining a dedicated storage environment matters. The right next step depends on your collection, available space, and how you want to access and display your wine. For help planning your storage, contact Wine Rack Concepts.
Shape Storage Around Your Collection
Your cellar can evolve as your collection changes. Think about how you want to select, display, and return smaller bottles, then build those habits into your storage plan. A layout suited to your routine makes a curated collection easier to enjoy and keeps half bottles from becoming an afterthought. If you plan to handcraft custom wooden shelving or bottle displays to accommodate non-standard formats, advice from FVCreations can help you choose the right lumber for the build.
Thoughtful wine racking for half bottles starts with a clear understanding of the space and the bottles it needs to hold. If you're planning a new cellar or refining an existing one, Wine Rack Concepts can help you bring wine racks, cellar cooling, and custom design together. The right choices depend on your room, collection, and preferred way of storing wine.
When you're ready to plan a storage space that works for your collection, request a free custom wine cellar design from Wine Rack Concepts.
Give every bottle a considered place in a cellar you'll be proud to use.
Frequently Asked Questions
What does wine racking mean for half bottles?
For half bottles, the phrase usually means transferring wine into smaller bottles for storage or serving. In winemaking, racking more specifically means moving wine from one vessel to another while leaving sediment behind; filling bottles is the bottling stage. A 375 ml bottle is the half-bottle format. Keeping these terms distinct helps clarify whether you're separating wine from sediment or preparing it for individual portions.
Have an expert help today!
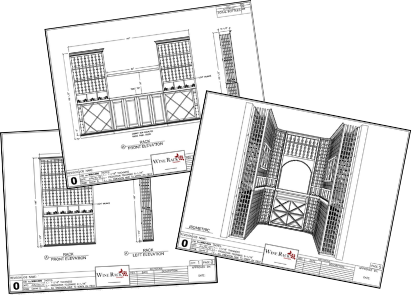
Free 2D wine cellar design