How to Install Wine Racks: A Guide to Secure Storage

*Pictures are renderings. Actual wine racks may look different
A single bottle of wine is a delight, but a full collection represents a significant structural load that demands respect. When you consider that a standard case of wine weighs roughly 40 pounds, the pressure on your wall mounting points becomes immediately clear. You've likely felt that flicker of anxiety while wondering if a standard anchor is enough to keep your prized vintages from a disastrous fall. Understanding how to install wine racks properly isn't just about aesthetics; it's about protecting your investment through engineering and precision.
It's natural to feel overwhelmed by the variety of mounting hardware and the different requirements for masonry, studs, or timber. You want a display that looks professional and remains perfectly level under the weight of a growing collection. We'll show you how to achieve that peace of mind. This guide provides the expert techniques needed to secure wood, metal, and contemporary storage systems like the Vintner or Fusion series. We'll walk through the essential tools, hardware selection, and alignment strategies that transform a simple wall into a sophisticated, secure gallery for your wine.
Key Takeaways
- Identify the exact high-precision tools and hardware required to verify the weight-bearing capacity of your walls before starting any project.
- Master the spatial calculations for how to install wine racks using metal frames, ensuring you have the correct clearance for bottle necks and primary weight support from studs.
- Follow a structured assembly process for modular wood series like Vintner or Classic, utilizing wood glue and finish nails for a permanent, professional bond.
- Learn the technical nuances of specialty systems, from drilling precise holes for Wine Peg series to managing tension in Cable and Glass wine walls.
- Ensure your storage layout promotes optimal airflow for cooling units while preserving the integrity of your cellar's vapor barriers and insulation.
Essential Tools and Site Preparation for Installation
Success in any cellar project depends on the quality of your preparation. Before you begin the physical assembly, you must ensure your environment is ready to support the substantial weight of a full collection. Learning how to install wine racks starts with a clear understanding of your workspace and the technical demands of your chosen storage system. If you're still in the conceptual phase, utilizing a free design service can help clarify the specific layout requirements for your space.
The Professional Tool Checklist
Precision is the hallmark of a master craftsman. While a standard bubble level works for small projects, a laser level is indispensable for ensuring a perfectly straight horizontal line across multiple modular units. This tool allows you to maintain aesthetic harmony, especially when aligning wooden wine racks like the Vintner or Classic series. Your kit should also include:
- Stud Finder: Essential for identifying the structural heart of your wall.
- Impact Driver: Provides the necessary torque to drive fasteners securely without stripping heads.
- Specific Drill Bits: Use carbide-tipped bits for masonry and high-speed steel bits for wood.
- Rubber Mallet: Vital for tapping components into place without marring the finish.
Assessing Wall Substrates and Load Limits
Your wall's composition dictates your choice of hardware and the ultimate safety of your bottles. Standard drywall installations typically rely on studs spaced at 16-inch centers. If your layout doesn't align with these studs, high-quality toggle bolts are necessary for secure anchoring. For those working with masonry or concrete, Tapcon screws offer the grip required for heavy loads. It is also helpful to understand wine rack materials and types to determine which fasteners best suit your specific racking style.
Calculating the "wet weight" is a critical step in site preparation. A standard 750ml bottle weighs approximately 3 pounds. A 100-bottle display adds 300 pounds of pressure to your wall, not including the weight of the racks themselves. If you are installing metal wine racks or the Fusion Wine Wall series, verify that your substrate can handle this concentrated load. If you encounter non-standard surfaces like stone veneer or tile, specialized diamond-tipped bits and extended fasteners will be required to reach the structural backing safely. Clear the area entirely before starting to ensure you have the physical clearance needed to maneuver long racking components without obstruction.
Step-by-Step: Installing Wall-Mounted Metal Racks
Wall-mounted metal systems offer a sleek, modern aesthetic that transforms a simple wall into a focal point of the home. Mastering how to install wine racks in a metal configuration requires a blend of design planning and structural precision. These systems are often modular, which allows for significant customization, but their minimalist profiles demand exact alignment to function correctly. Adhering to professional installation safety requirements ensures your display remains as secure as it is beautiful.
Mapping Your Layout
Visualization is the first step toward a successful installation. Before you reach for the drill, use painter's tape to map out the final layout on your wall. This step is crucial for ensuring you have adequate vertical clearance for various bottle types. While a standard Bordeaux bottle is roughly 12 inches tall, sparkling wine or magnums require additional spacing to prevent the glass from clashing. Mark your starting point with a pencil, then use your laser level to project a line where the primary vertical spines will sit. Precision at this stage prevents the frustration of a crooked display later. If you're unsure about the optimal spacing for your collection, our team offers personalized design assistance to help you map out your space.
Fastening and Securing the Hardware
Securing the hardware begins with identifying your wall studs. Driving screws directly into timber provides the highest level of structural integrity for heavy loads. If your layout forces you to mount between studs, use heavy-duty toggle bolts designed for the specific weight of your rack. Once the first vertical spine is in place, check it for perfect vertical plumb before tightening the fasteners completely. Connect subsequent modular sections using manufacturer-provided couplers, then double-check the horizontal alignment across the top rails. This methodical approach ensures the weight is distributed evenly across the entire system.
- Mark Pilot Holes: Use a small bit to create guides that prevent the rack from shifting during the final drive.
- Check Plumb and Level: Verify vertical and horizontal alignment after every third fastener.
- Structural Integrity: Ensure fasteners penetrate at least 1.5 inches into the wall studs.
Perform a final weight-bearing test by applying firm downward pressure on the empty racks. If you notice any movement or flexing in the wall substrate, reassess your anchor points before loading your wine. A secure installation provides the confidence that your collection is protected for years to come.
Assembling and Securing Floor-to-Ceiling Wood Systems
Traditional wood racking provides a timeless warmth and high-capacity storage that metal systems often cannot match. However, the sheer weight of modular wood components requires a different structural approach. If you are learning how to install wine racks in a floor-to-ceiling configuration, you must prioritize vertical stability and consistent spacing. Before beginning, explore our wooden wine racks to understand the specific dimensions of the Vintner or Classic series you are working with.
Organization is the first step in a successful build. Sort your components by height and depth to avoid confusion during assembly. Most professional installers start by applying a bead of high-quality wood glue to the joints before securing them with finish nails. This dual-attachment method ensures the rack remains rigid over decades of use. Using spacer bars between modular sections is equally important; these simple tools maintain even gaps and prevent the visual "crowding" that occurs when racks are pushed too tightly together.
Building the Foundation
A secure installation starts at the floor. If your cellar floor is not perfectly level, your entire vertical display will lean, creating uneven pressure on the wall anchors. Check the base area with your laser level and use shims if necessary to create a flat starting point. When assembling modular kits like the Carpenter series, build the base units first to establish the footprint. A pneumatic nail gun is highly recommended for this stage. It allows for clean, professional joinery without the risk of hammer marks or "marring" the wood surface, which is a common issue with manual nailing.
Anchoring for Seismic and Load Safety
Once your vertical sections are assembled and positioned, you must address the risk of tipping. High-capacity wood systems are extremely heavy when fully loaded, making wall anchoring a non-negotiable safety step. Use heavy-duty L-brackets to secure the racks to wall studs at both the midpoint and the top of the unit. This two-point connection prevents the rack from pulling away from the wall under the weight of the bottles. For commercial-scale installations or areas prone to seismic activity, consider toe-nailing the base of the racks directly into the floor. This technique involves driving nails at an angle through the base plate into the subfloor, providing an extra layer of structural permanence that keeps the entire system locked in place. By following these methodical steps, you ensure that your how to install wine racks project results in a display that is as safe as it is beautiful. For broader facility upgrades, you can discover A1 Precision Solutions to handle turnkey commercial and industrial fit-outs with professional expertise.
Specialty Installations: Wine Pegs and Fusion Walls
Contemporary storage moves beyond traditional cubicles toward a minimalist, label-forward display. The Wine Peg Series exemplifies this trend, but its success relies entirely on the precision of the initial layout. When learning how to install wine racks of this variety, you aren't just mounting a unit; you're creating a structural grid from scratch. This process involves drilling precise holes into a custom backer board, which must be robust enough to support the torque of a cantilevered bottle. Plywood is often preferred over MDF for these backer boards because it offers superior screw-holding strength for the heavy weight of full bottles.
Precision Placement for Wine Pegs
To ensure consistent spacing across a large wall, creating a rigid physical template from a piece of pegboard or thin acrylic is far more reliable than measuring each point individually. Once the holes are drilled, each peg must be secured using industrial-grade fasteners to prevent rotation. If a peg begins to spin, the bottle's safety is immediately compromised. Learn about custom wine cellar design to see how these pegs integrate into high-end architectural projects that prioritize both style and security.
The Fusion Wine Wall series offers a sophisticated middle ground by combining metal frames with wood accents. Installation involves securing the slim metal chassis to the wall while ensuring the wood trim pieces snap or screw into place seamlessly. The goal is to hide all mounting hardware, creating a "floating" aesthetic that emphasizes the wine rather than the structure. This requires careful coordination between the wall substrate and the decorative faceplates. You'll need to ensure the metal frame is perfectly level before the wood components are added, as any deviation will be magnified by the long, horizontal lines of the wood accents.
Tension and Alignment in Cable Systems
Cable and Glass Wine Racks represent the pinnacle of modern cellar engineering. These systems don't rely on wall studs in the traditional sense; instead, they use floor and ceiling mounting plates to anchor vertical cables. This creates a transparent look that is ideal for glass-enclosed cellars or room dividers where visibility is paramount and structural bulk is unwelcome.
Managing the tension requirements of these systems is a delicate balancing act. If the cables are too loose, the bottles will sag or sway; if they're too tight, you risk damaging the ceiling structure or the mounting plates. Adjust the tension incrementally, using a level to verify that the bottle supports remain perfectly horizontal. When integrating glass panels within this framework, ensure the gaskets are properly seated to prevent vibrations or glass-on-metal contact. Mastering how to install wine racks with this level of complexity ensures your collection remains secure in even the most daring architectural designs.
Integrating Climate Control and Final Inspections
The final phase of a professional installation involves harmonizing your physical storage with the environmental systems that preserve your collection. While the structural assembly is complete, your project isn't truly finished until you've ensured that the racking layout supports, rather than hinders, your cellar's climate control. Understanding how to install wine racks within a refrigerated space requires a deep respect for thermodynamics and moisture management. If you haven't yet selected your mechanical equipment, you can browse wine cellar cooling systems to find a unit that matches your room's thermal load requirements.
Installation and Airflow Management
Proper racking placement is vital for preventing "hot spots" where air becomes stagnant and temperatures fluctuate. You should maintain at least several inches of clearance around self-contained refrigeration units to ensure the intake and exhaust aren't obstructed. If a rack blocks the return air, the system will work harder, leading to premature mechanical failure and uneven aging of your vintages. In a room with R-13 or R-19 wall insulation, you must be extremely careful when driving long fasteners. Every screw that penetrates the 6 mil polyethylene vapor barrier should be sealed with a dab of silicone to prevent moisture from seeping into the wall cavity, which can lead to mold growth behind your beautiful display.
The Final Quality Assurance Walkthrough
Before you place a single bottle, perform a rigorous stability check. Move through the cellar and verify that every fastener is tight and every modular joint is secure. It's a good practice to apply a partial load to a few sections and check for any rack deflection. If the shelves bow or the vertical spines flex, you may need to add additional structural supports or wall anchors. Dust and wood shavings from the assembly process can settle on bottle labels and even affect the cellar's air quality, so wipe down all wood surfaces with a microfiber cloth before the final loading begins.
When you are ready to load the collection, always start from the bottom rows and work your way up. This strategy keeps the center of gravity low, which is a fundamental safety principle for high-capacity storage. By following this methodical approach, you transform a DIY project into a professional-grade wine cellar. For a deeper look at the planning stages that precede this work, consult our Custom Wine Cellar Design: The Essential Guide to ensure your layout meets luxury standards from the very beginning.
- Verify Airflow: Use a handheld anemometer or a simple piece of tissue to ensure air moves freely through the racks.
- Seal Penetrations: Check every anchor point for vapor barrier integrity.
- Weight Distribution: Distribute the heaviest bottles, like magnums, on the lowest reinforced shelves.
Protecting Your Collection with Structural Precision
Mastering how to install wine racks is the final step in transitioning from a simple bottle gatherer to a true curator. You've learned that structural integrity begins long before the first bottle is placed. It starts with selecting high-durability metal or wood series and ensuring your wall substrate can handle the substantial weight of a growing collection. By prioritizing precise alignment and specialized cooling integration, you protect both the physical safety of your glass and the chemical integrity of the wine itself.
Our team of specialized experts is ready to assist if you feel your project requires a higher level of technical oversight. We offer professional design consultations that account for every nuance of your space, from vapor barrier protection to optimal airflow management. You deserve a storage system that reflects the value of the vintages it holds.
Take pride in the craftsmanship of your installation. With a methodical approach and the right professional support, your cellar will remain a secure and aesthetically pleasing sanctuary for your wine for decades to come.
Frequently Asked Questions
Do I need to hire a professional to install my wine racks?
You don't necessarily need a professional for standard modular kits like the Vintner or Classic series, as they're designed for straightforward assembly. However, complex projects involving Cable and Glass systems or integrated cooling units often require specialized expertise to ensure structural safety and climate integrity. For those looking for high-end furniture and storage solutions that require master-level precision, you can discover Montagefokus AG, a specialist in professional assembly. If you're managing a high-capacity commercial installation, a professional's touch ensures your display meets rigorous safety standards and aesthetic expectations.
Can I install wine racks on a drywall surface without studs?
You can install wine racks on drywall without studs, provided you use high-quality toggle bolts or heavy-duty anchors. While driving screws directly into timber studs offers the maximum structural integrity, modern fasteners can support significant weight on drywall alone. It's vital to calculate the total "wet weight" of your bottles before selecting hardware. If the load exceeds the anchor's rating, you risk a structural failure that could damage your collection.
How much weight can a standard wall-mounted wine rack hold?
A standard wall-mounted rack's capacity depends largely on the mounting hardware and the wall substrate. Since a typical 750ml bottle weighs approximately 3 pounds, a 12-bottle rack must support 36 pounds of wine plus the weight of the metal or wood frame. Most professional-grade systems are engineered to handle several hundred pounds when properly anchored into studs. Always verify the manufacturer's specific load ratings to ensure your installation remains secure under full capacity.
What is the best height to install a wall-mounted rack for accessibility?
The ideal height for a primary display row is usually around 60 to 66 inches from the floor, placing labels at eye level for most viewers. This positioning makes it easy to read labels and retrieve bottles without excessive reaching or bending. If you're planning how to install wine racks across an entire wall, prioritize the most frequently accessed vintages in this strike zone while using higher or lower rows for long-term aging.
How do I install wine racks on a stone or brick cellar wall?
Installing racks on masonry requires specialized tools, specifically a hammer drill and carbide-tipped masonry bits. You'll need to use Tapcon screws or expanding lead anchors to create a permanent grip within the stone or brick. It's often easier to mount a wood backer board to the masonry first, then attach your racking to that board. This method provides a level surface and simplifies the process of how to install wine racks on uneven natural stone.
Should I install my cooling system before or after the racking?
You should ideally install the cooling system infrastructure, such as the vapor barrier and dedicated electrical lines, before the racking goes in. Once the room is sealed and insulated, the physical cooling unit can be mounted. Installing the racks afterward ensures you don't block essential airflow or exhaust ports. This sequence prevents hot spots and allows you to coordinate the layout of your Vintner or Fusion series with the unit's cooling arc.
What type of screws should I use for a wooden wine rack assembly?
For the actual assembly of wood components, use a combination of high-quality wood glue and 18-gauge finish nails for a clean, professional look. Regarding the mounting process, 2.5-inch or 3-inch wood screws are standard for reaching through drywall into the center of a stud. Selecting professional-grade, corrosion-resistant hardware is essential in high-humidity cellar environments to prevent the wood from staining or the fasteners from weakening over time.
How do I ensure my floor-to-ceiling wine racks are perfectly vertical?
Achieving a perfectly vertical plumb line requires a high-precision laser level and the strategic use of shims. Start by leveling the floor base, as any slight tilt at the bottom will be magnified at the ceiling. Use your level to check both the front and sides of the vertical uprights as you secure the wall anchors. This methodical approach ensures that the weight of the bottles is distributed evenly through the frame rather than pulling against the fasteners.
Have an expert help today!
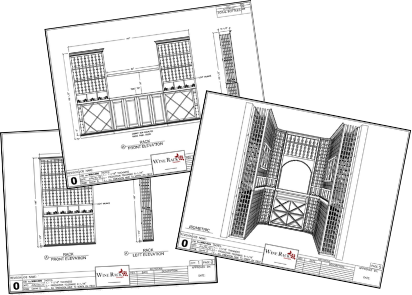
Free 2D wine cellar design