Dedicated Wine Room Construction: The Complete Step-by-Step Guide

*Pictures are renderings. Actual wine racks may look different
The most expensive mistake in cellar design isn't picking the wrong timber; it's treating a wine cellar like an ordinary room. Beautiful racking and ambient backlighting often capture the imagination first, but dedicated wine room construction requires building a specialized microclimate from the studs out. If you don't engineer a continuous building envelope, even the finest bottles risk cork degradation, temperature spikes, and hidden mold behind drywall.
You probably already know that protecting fine wine demands strict conditions: a steady 55°F environment paired with 50% to 70% relative humidity. Achieving that stability in your home can feel daunting when you're weighing vapor barrier locations, framing depths, and through-the-wall versus ducted split cooling systems. In this comprehensive guide, you'll learn the architectural framing, insulation standards, mechanical equipment, and racking layouts needed to construct an enduring, climate-controlled space. We'll walk through the entire building process step by step, ensuring your investment remains protected and beautifully displayed for decades to come.
Key Takeaways
- Plan your layout around long-term collection growth, accounting for structural load limits, room orientation, and insulation depth from day one.
- Master the building envelope by installing an unbroken vapor barrier on the warm exterior side to stop condensation, mold, and structural rot.
- Calculate precise heat loads to size specialized cooling units, comparing through-the-wall systems against ducted split equipment for optimal noise and performance.
- Discover the essential trade sequence and framing milestones that ensure smooth dedicated wine room construction without costly retrofits.
- Combine high-density bulk storage with custom showcase racking using durable, cellar-safe hardwoods and modern metal systems.
Planning Your Dedicated Wine Room: Location, Sizing, and Structural Demands
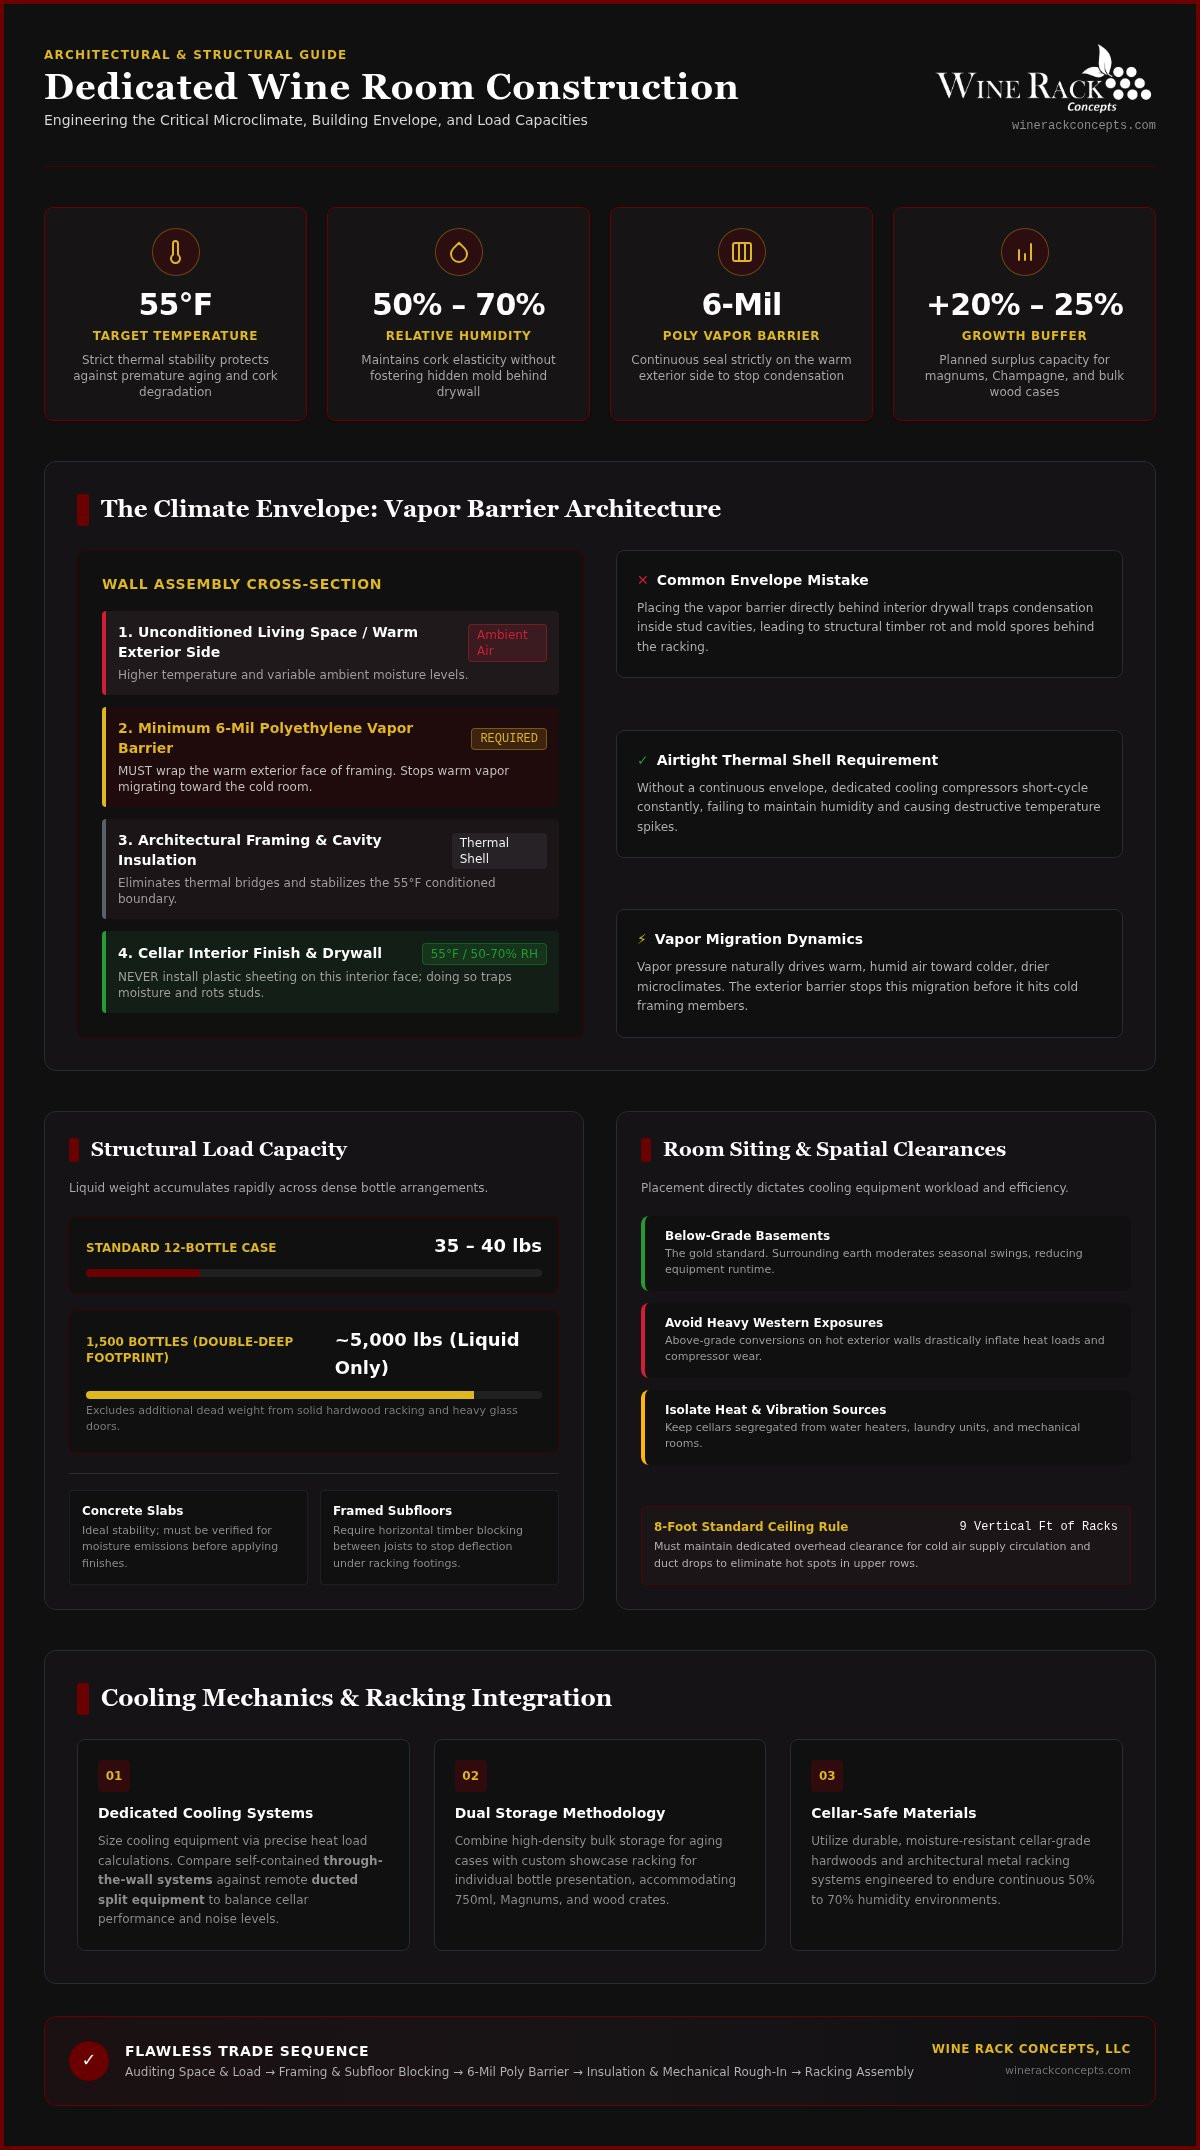
Every cellar project begins long before swinging a hammer or choosing finishes. Successful dedicated wine room construction starts by auditing your spatial constraints, your current inventory, and your acquisition habits over a five-to-ten-year horizon. A standard 750ml bottle requires dedicated clearance, but collectors frequently acquire magnums, Champagne, and bulk wood cases. Planning for roughly twenty to twenty-five percent beyond your present storage target ensures your cellar accommodates future allocations without requiring immediate structural remodels.
To visualize how these spatial dimensions translate into functional wall displays and proper insulation boundaries, watch this step-by-step overview:
Evaluating Optimal Locations Within the Home
Room placement directly dictates mechanical workload. Below-grade basements remain the gold standard because surrounding earth naturally moderates seasonal swings, helping maintain proper wine storage conditions with lower energy draw. If converting above-grade spaces, avoid exterior walls with heavy western sun exposure. Keep the room separated from mechanical rooms, water heaters, and laundry appliances that radiate ambient heat and generate micro-vibrations.
Ceiling height is equally critical during location scouting. A standard eight-foot ceiling accommodates nine vertical feet of racking when accounting for top and bottom trim molding. However, you also need clearance above the racks for cold air supply circulation and duct drops. Squeezing racks tightly against the ceiling chokes airflow and produces hot spots in upper bottle rows.
Floor Load Capacity and Structural Reinforcement
Liquid adds up fast. A standard case of twelve bottles weighs approximately thirty-five to forty pounds. When you assemble a high-density, double-deep footprint containing 1,500 bottles, the stored liquid alone adds nearly 5,000 pounds over a compact square footage. That does not account for the weight of solid hardwood cabinetry or heavy glass enclosures.
- Concrete Slabs: Ground-level concrete slabs provide ideal stability, though they must be verified for moisture emissions before laying finishes.
- Framed Subfloors: Second-story rooms or framed spaces over basements often require structural engineering assessments to prevent joist deflection under dead weight loads.
- Subfloor Blocking: Add horizontal timber blocking between joists under racking footings to provide solid, secure anchoring points before closing the ceiling below.
Taking the time to resolve these structural demands early simplifies every subsequent trade. If you need assistance translating collection targets into functional blueprints, our team provides complimentary free design services to verify bottle capacities, floor layouts, and vertical airflow clearances before framing begins.
Constructing the Climate Envelope: Vapor Barriers, Insulation, and Framing
A wine cellar cooling unit cannot perform without an airtight thermal shell. In dedicated wine room construction, the climate envelope serves as a protective shield separating your conditioned 55°F environment from fluctuating living spaces. Skipping envelope integrity causes cooling compressors to short-cycle, leading to severe condensation, rotting timber studs, and ruined vintage labels. Standard residential framing practices simply will not suffice here.
Vapor Barrier Installation and Permeability Rules
Vapor moves from warm, humid air toward colder, drier air. Because your wine cellar is kept cold and humid relative to the exterior living space, you must install a minimum 6-mil polyethylene vapor barrier strictly on the warm exterior side of the framing. Never place sheet plastic on the interior side beneath the drywall; doing so traps moisture inside wall cavities, creating a haven for mold.
Wrap the exterior face of all perimeter stud walls and ceiling joists, overlapping adjoining sheets by at least twelve inches. Seal every overlap with heavy-duty moisture-barrier tape. Every penetration, including electrical outlet boxes, switch junctions, and refrigerant line routings, must be wrapped and foamed airtight to prevent vapor intrusion that violates established wine cellar cooling standards.
Insulation Types: Closed-Cell Spray Foam vs Fiberglass Batt
Achieving stable thermal resistance prevents the mechanical system from straining during peak summer heat. Framing walls with 2"x4" studs provides space for R-13 to R-15 insulation, while 2"x6" framing allows for R-19 performance. Cellar ceilings require greater thermal resistance, targeting a minimum of R-19, with R-30 being far more effective at resisting heat transfer from overhead rooms.
- Closed-Cell Spray Foam: This serves as both high-density insulation and an impermeable vapor barrier in one step. Spraying three inches into stud bays expands into gaps, sealing cracks without requiring separate 6-mil plastic.
- Fiberglass Batts: An effective choice when budget dictates conventional methods, provided you install seamless 6-mil polyethylene sheeting across the entire warm boundary first. Cut batts tightly around wiring to avoid uninsulated voids.
Moisture-Resistant Wallcoverings and Exterior-Grade Doors
Standard residential drywall deteriorates quickly in sustained 60% humidity. Line interior walls with moisture-resistant green board drywall or cementitious backer board. Finish surfaces with zero-VOC, water-based paints to prevent chemical off-gassing, which can migrate through corks and taint delicate wines over long maturation periods.
Every envelope requires an exterior-grade entrance. Hang solid-core wood doors or thermally broken metal cellar doors fitted with continuous weatherstripping and an automatic bottom drop sweep. If incorporating modern glass walls, specify dual-pane, argon-filled tempered glazing to stop surface sweating and heat gain. As you detail these framing parameters, securing a complimentary wine cellar design helps align stud spacing and blocking with your chosen racking components.
Selecting and Sizing Dedicated Wine Cellar Cooling Systems
A standard comfort air conditioner drops room temperatures by removing moisture aggressively, leaving indoor air dry and cool. Fine wine demands the exact opposite. Long-term aging requires a constant 55°F paired with 50% to 70% relative humidity to keep corks supple and stop slow liquid oxidation. Sizing mechanical refrigeration is the heart of dedicated wine room construction. It hinges on an accurate British Thermal Unit (BTU) heat load calculation that factors interior cubic volume, framing R-values, floor assemblies, and glass surface square footage.
Self-Contained Units vs Split Refrigeration Systems
Matching mechanical architecture to your floor plan determines cellar aesthetics and ambient sound levels. Manufacturers like WhisperKOOL, Wine Guardian, and CellarPro engineer distinct configurations to address different structural layouts:
- Through-the-Wall Systems: Compact, self-contained units house the compressor and evaporator in a single chassis. They mount directly through an interior wall cut, exhausting warm air into a well-ventilated, conditioned adjacent room of equal or greater size. They offer straightforward placement but introduce moderate background operating noise inside the cellar.
- Ducted Split Systems: These isolate the noisy condensing unit in an exterior location or remote utility room, piping chilled air into the cellar through hidden ductwork. Modern split configurations routinely run below 45 dB, making them nearly silent while completely removing equipment boxes from your aesthetic wall displays.
- Ductless Split Systems: When running bulky ductwork through finished ceilings isn't feasible, a slim interior wall evaporator connects to an outdoor condenser via small copper refrigerant lines.
Exploring engineered wine cellar cooling models with modern variable-speed inverter compressors can yield up to 40% energy savings compared to traditional on-off compressors, minimizing temperature swings.
Managing Condensation, Drainage, and Ventilation Exhaust
Cooling systems pull ambient moisture out of the air as they draw the room down to 55°F. Install a dedicated, gravity-fed condensate drain line piped out of PVC or reinforced copper, adding a shallow P-trap to block sewer gases. In finished spaces where gravity pitch is impossible, wire an automatic condensate pump with a high-water cutoff switch directly to the cooling unit's electrical board. If the line clogs, the unit cuts out before trays overflow onto custom cabinetry.
Lighting Design and Heat Output Reduction
Traditional halogen and incandescent bulbs act like small heaters inside a tightly sealed envelope, forcing cooling units to run continuously. Install low-voltage, sealed LED strip fixtures rated below 3000K warm white. LEDs produce virtually zero forward heat and emit no ultraviolet radiation, protecting bottles from chemical light-strike damage. Pair fixtures with smart dimmers or discreet occupancy sensors so the room remains dark when unoccupied.
Integrating Custom Wine Racks: Materials, Layouts, and Bottle Display
A striking wine room does not force you to choose between storage density and visual theater. The true artistry in dedicated wine room construction lies in balancing bulk bottle capacity with deliberate showcase moments. Bottled wine must lie horizontally or at an angle under fifteen degrees; this keeps natural corks perpetually saturated by liquid, preventing shrinkage that lets oxygen seep into the neck. Beyond that core preservation rule, your racking layout should celebrate your collection while preserving fluid convective airflow across every tier.
Traditional Hardwood Racking: Classic, Vintner, and Carpenter Series
For collectors who favor warmth and timeless millwork, traditional timber assemblies provide unmatched architectural depth. Premium wooden wine racks built from unstained, moisture-resistant species like White Oak naturally withstand 60% relative humidity without warping. Avoid fragrant softwoods like aromatic cedar, whose pungent phenols can penetrate natural cork closures over time.
- Individual Bottle Columns: Found in collections like the Classic, Carpenter, and Vintner Series, these cradle standard bottles securely with smooth hand-sanded edges.
- High-Reveal Display Rows: Angled display runs set at eye level highlight prized labels beneath soft LED illumination.
- Bulk Case Bins and Diamond Cubes: Lower storage sections handle full wooden cases, magnums, and high-volume daily reserves with maximum space efficiency.
Modern Metal and Cable Systems for Contemporary Displays
Modern cellars frequently lean into industrial clarity and minimalist geometries. Sleek metal wine racks and label-forward assemblies turn bottles into suspended wall art, letting you identify vineyards without disturbing the bottles. Systems like the Wine Peg Series anchor directly through finished surfaces into pre-installed structural wall backing.
If you prefer an open, floating silhouette, Cable Wine Racks suspend bottles on high-tensile stainless steel lines anchored from floor to ceiling. Alternatively, Fusion Wine Walls combine textured timber backer panels with engineered metal hardware, blending the structural warmth of wood with the sleek profile of satin black or brushed metal pins.
All-Glass Wine Enclosures and Thermal Considerations
Integrating an All Glass Wine Enclosure turns a private cellar into the architectural centerpiece of an adjoining dining or living room. However, standard plate glass provides almost zero thermal resistance. Glass cellar walls must feature dual-pane, tempered glass panels treated with low-emissivity coatings and warm-edge spacers. Because expansive glass dramatically increases your heat gain, you must factor that thermal load into your cooling calculations and incorporate thermally broken perimeter channels to eliminate cold condensation dripping along the base.
Pairing these disparate materials requires thoughtful architectural planning so your storage layout perfectly matches your collection goals. You can visualize custom wine room services by requesting a tailored digital blueprint.
Construction Workflow: Managing Trades, Milestones, and Commissioning
A flawless cellar build relies on disciplined timing. Because specialized refrigeration, electrical runs, and heavy millwork intersect inside a compact footprint, dedicated wine room construction demands a strict sequence of trades. Installing drywall before verifying line-set pressures or hanging custom racking before inspecting wall backing inevitably triggers costly retrofits. A systematic project schedule keeps framers, mechanical technicians, and trim carpenters working in unison.
Trade Coordination: Electricians, HVAC Techs, and Finish Carpenters
Miscommunication between subcontractors causes most job-site delays. Hand your mechanical installer and electrician the manufacturer cut sheets before framing starts. Dedicated cooling circuits require distinct breaker amperages to handle compressor startup spikes without tripping.
- Rough Framing and Solid Backing: After erecting stud walls, carpenters must install horizontal 2"x6" wood backing between stud bays at thirty-six, forty-eight, and seventy-two inches above the subfloor. This guarantees solid wood meat for anchoring heavy racking assemblies later.
- Mechanical and Plumbing Rough-Ins: HVAC technicians route copper line sets, electrical control wiring, and primary condensate lines. Plumbers must verify a minimum one-quarter-inch per foot slope on drainage runs and test trap water seals.
- Envelope Inspection: Before insulation batts or spray foam close the wall bays, inspect every wire penetration and junction box to ensure they are fully sealed against vapor migration.
Room Commissioning, Temperature Pull-Down, and Testing
Do not stock your collection the moment the cooling system turns on. Fresh drywall compound, tile thinset, and paints take several days to cure fully and release residual moisture. Power on the refrigeration system and initiate a gradual temperature pull-down, targeting a reduction of no more than three to five degrees per day until reaching 55°F.
Place a calibrated digital hygrometer inside the empty room for a minimum of forty-eight hours. Relative humidity should stabilize between 50% and 70%. During this stabilization window, perform a flashlight inspection along perimeter door seals. Close the door with room lights extinguished outside; if you see light escaping around jamb weatherstripping or the bottom automatic sweep, air infiltration will compromise system efficiency.
Finalizing Your Custom Wine Room Project
Once environmental balance holds steady, lay moisture-impervious finish flooring such as porcelain tile, slate, or sealed stone. Avoid carpets or unsealed softwoods that trap humidity. Finish carpenters can then assemble the millwork, securing top and center rails directly into your pre-installed wall backing with structural cabinet screws.
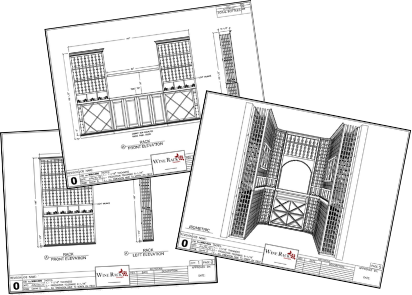
Pulling these trade requirements together is straightforward when you work from a coordinated set of plans. If you are preparing to frame your space, submit your room dimensions for a free custom wine room design to receive detailed elevations, electrical drops, and structural backing locations tailored to your build.
Bringing Your Wine Cellar Vision to Life
Mastering dedicated wine room construction comes down to executing the hidden structural details before savoring the aesthetic rewards. When you build an airtight thermal envelope, install an exterior-side vapor barrier, and select refrigeration matched to your room's exact heat load, you create an enduring sanctuary for your collection. From there, choosing between classic White Oak millwork, sleek metal pins, or floating cable systems transforms preserved bottles into a personal design statement.
Every bottle you acquire represents an investment of passion, patience, and craft. Our nationwide team pairs precision engineering with custom millwork, giving you direct access to premier cooling brands like WhisperKOOL, Wine Guardian, and CellarPro alongside handcrafted wooden and contemporary metal displays. Let's collaborate to turn your available square footage into an architectural showcase that protects your vintages for years to come.
With careful planning and the right structural foundation, your dream cellar is well within reach.
Frequently Asked Questions
Can I convert a standard closet into a dedicated wine room?
Yes, standard reach-in or walk-in closets make excellent compact cellars when retrofitted properly. The existing interior drywall must be removed down to the studs to install a proper vapor barrier, high-performance insulation, and dedicated electrical circuits. You also need an exterior-grade sealed door and an adjacent room or ducted pathway capable of handling refrigeration exhaust heat.
Why is a vapor barrier necessary when building a wine room?
A continuous vapor barrier prevents warm, moisture-laden household air from migrating into the cold cellar cavity. Without an unbroken 6-mil polyethylene sheet on the warm exterior side of the framing, temperature differentials force water vapor through wallboard. This leads to hidden mold colonization, decaying wall studs, and catastrophic moisture damage to your wine collection.
What is the ideal temperature and humidity for a dedicated wine room?
The standard benchmark for fine wine storage is a consistent 55°F paired with 50% to 70% relative humidity. Keeping temperatures steady prevents wine from expanding and contracting past the cork. Maintaining proper ambient humidity ensures natural corks stay elastic and damp, eliminating cork shrinkage that causes premature bottle oxidation.
How much insulation is required for wine cellar walls and ceilings?
Framed cellar walls require a minimum of R-13 to R-15 insulation in 2"x4" assemblies, though 2"x6" framing delivering R-19 performance is preferred. Ceilings demand higher thermal resistance to combat heat migrating from upper living areas; aim for a minimum of R-19, with R-30 providing superior energy efficiency. High-performance dedicated wine room construction often uses closed-cell spray foam to hit these targets.
Can a standard residential air conditioner cool a wine room?
No, standard home air conditioners cannot safely cool a cellar. Residential systems are engineered to drop room temperatures to around 70°F while actively removing humidity from the living environment. Wine cooling systems from manufacturers like WhisperKOOL, Wine Guardian, and CellarPro are specifically engineered to maintain 55°F while preserving essential humidity levels without freezing evaporator coils.
What flooring materials work best inside a dedicated wine cellar?
Hard, non-porous surfaces like porcelain tile, slate, marble, or sealed concrete perform best under sustained 60% humidity. Avoid residential carpet, engineered wood flooring, or unsealed laminate. These materials absorb ambient moisture readily, leading to subfloor buckling, adhesive failure, and mildew growth beneath floor-mounted millwork.
How long should a wine room run before stocking bottles?
Allow your refrigeration system to run empty for at least forty-eight hours to several days before loading inventory. This initial testing window verifies that building adhesives and paints have fully cured. It also gives the equipment time to establish thermal equilibrium, confirm accurate hygrometer readings, and ensure condensate drain lines operate without leaks during initial dedicated wine room construction.
Have an expert help today!
Free 2D wine cellar design